
Methods of studying cells (3.2.1.3)
On this page
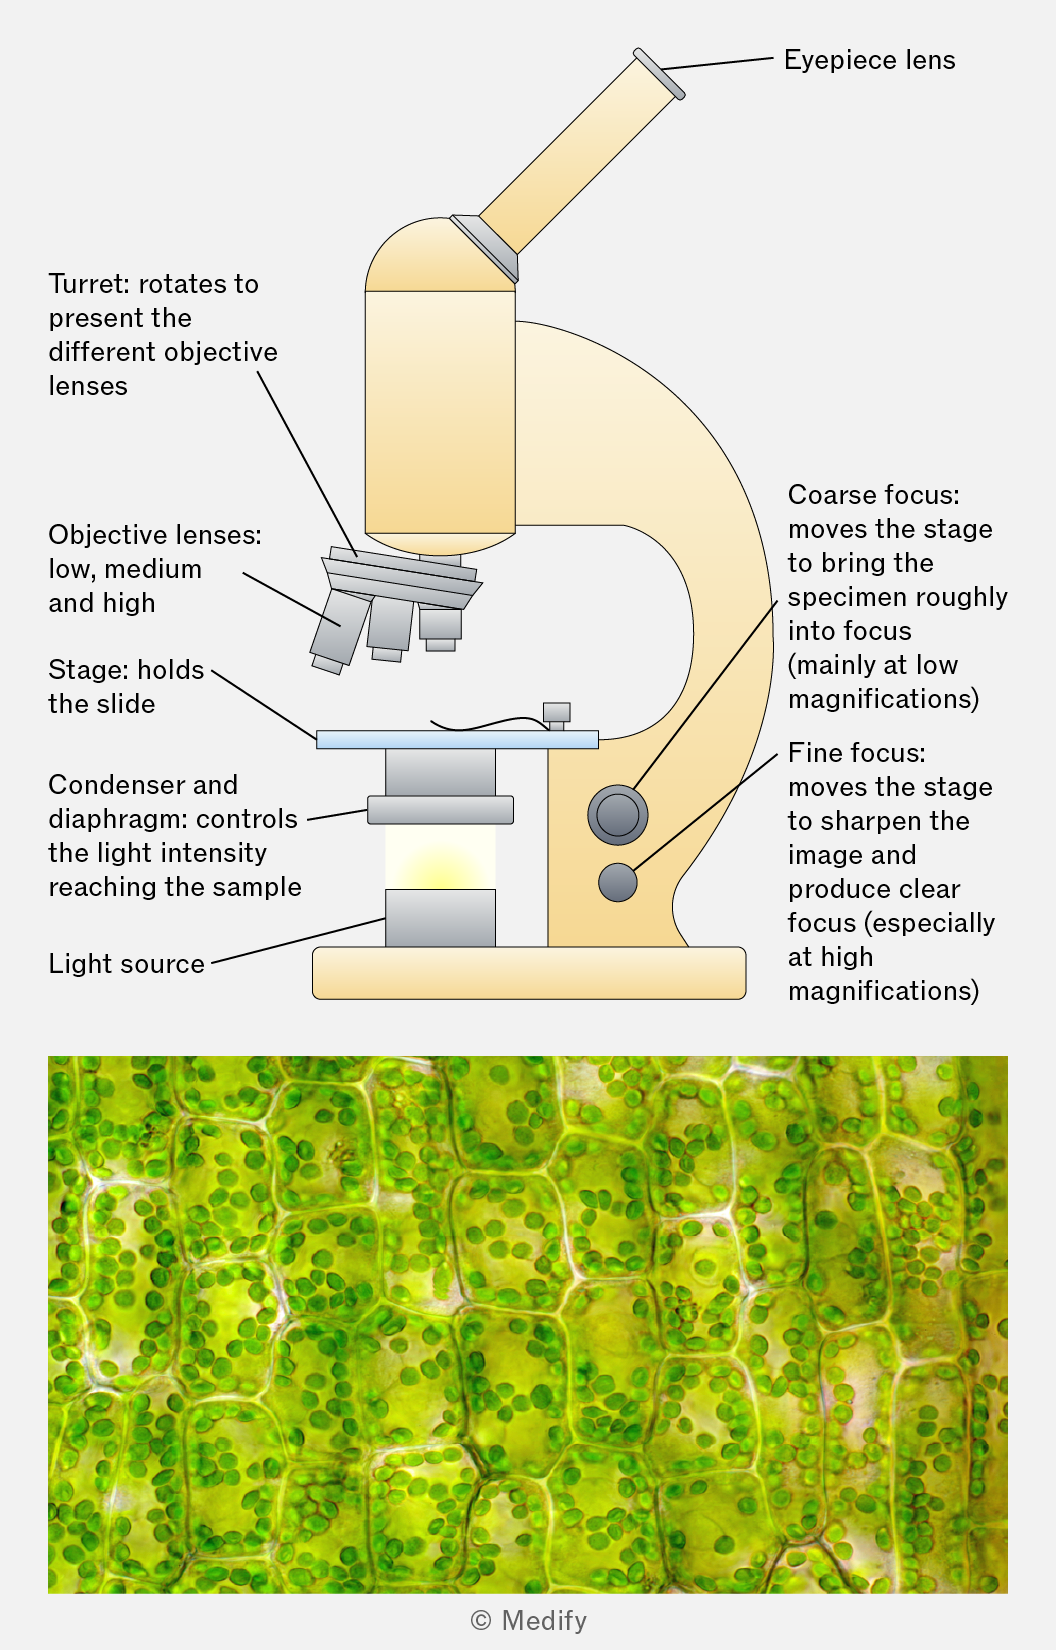
Microscopes are a crucial tool in biology for observing cells, organelles, tissues, and microorganisms. They magnify features that are too small to see with the naked eye.
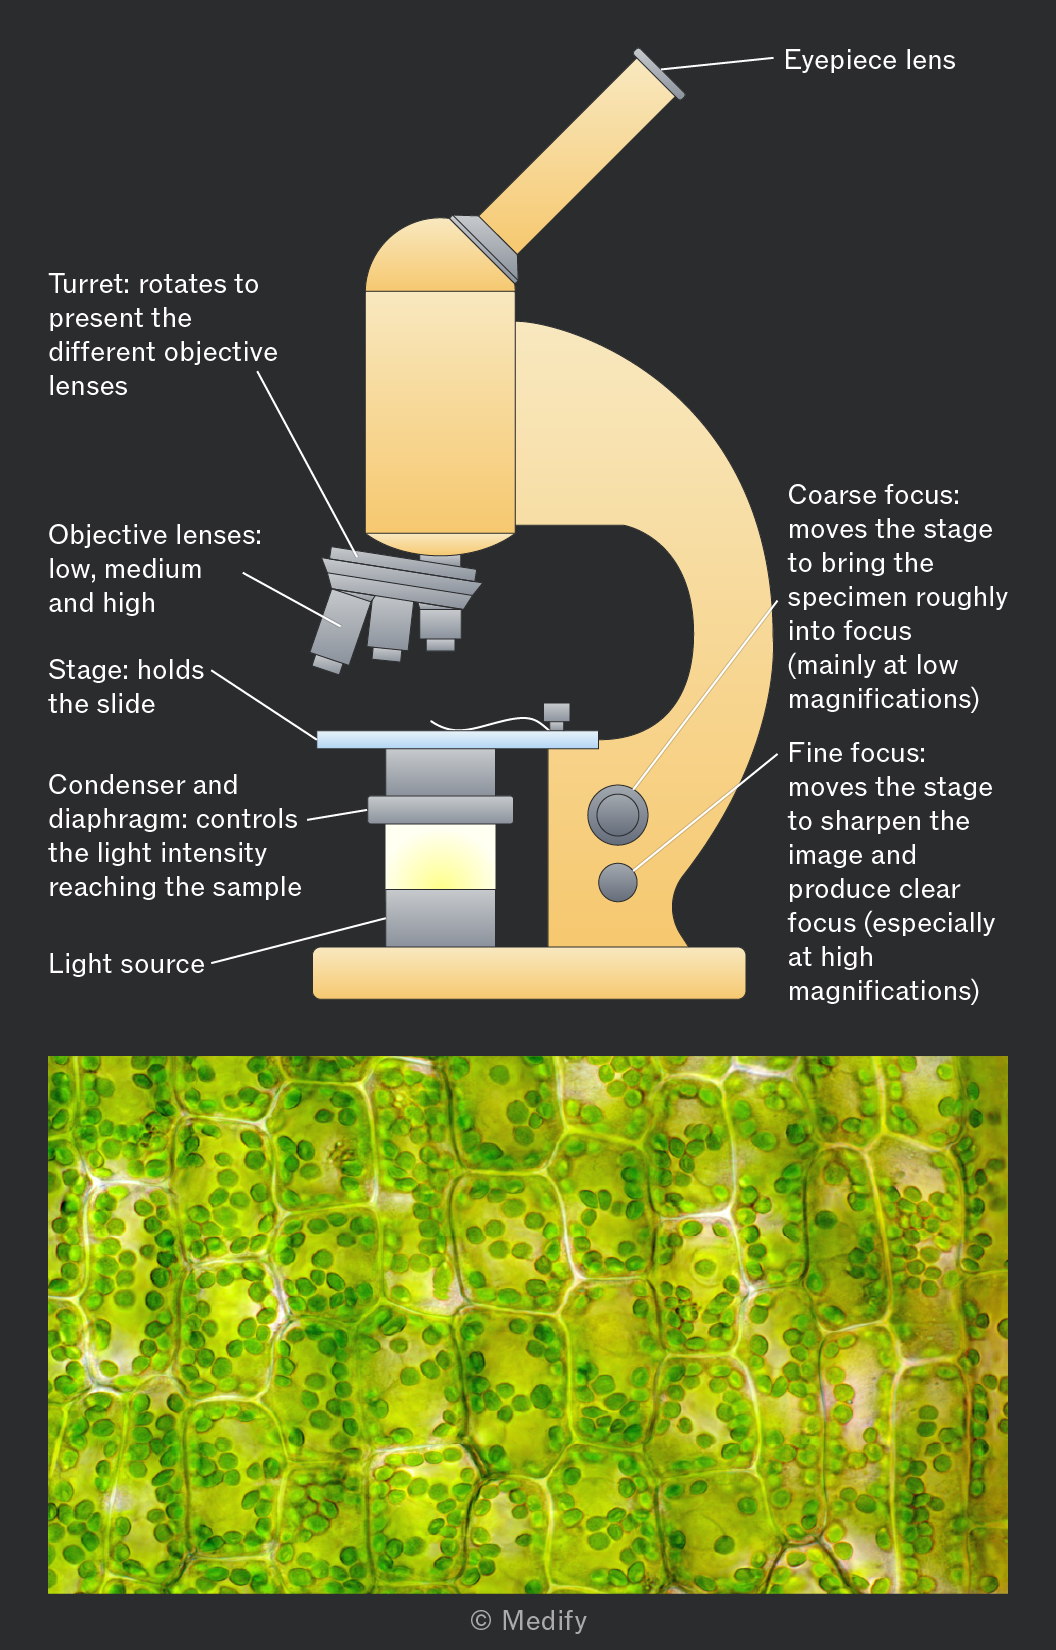
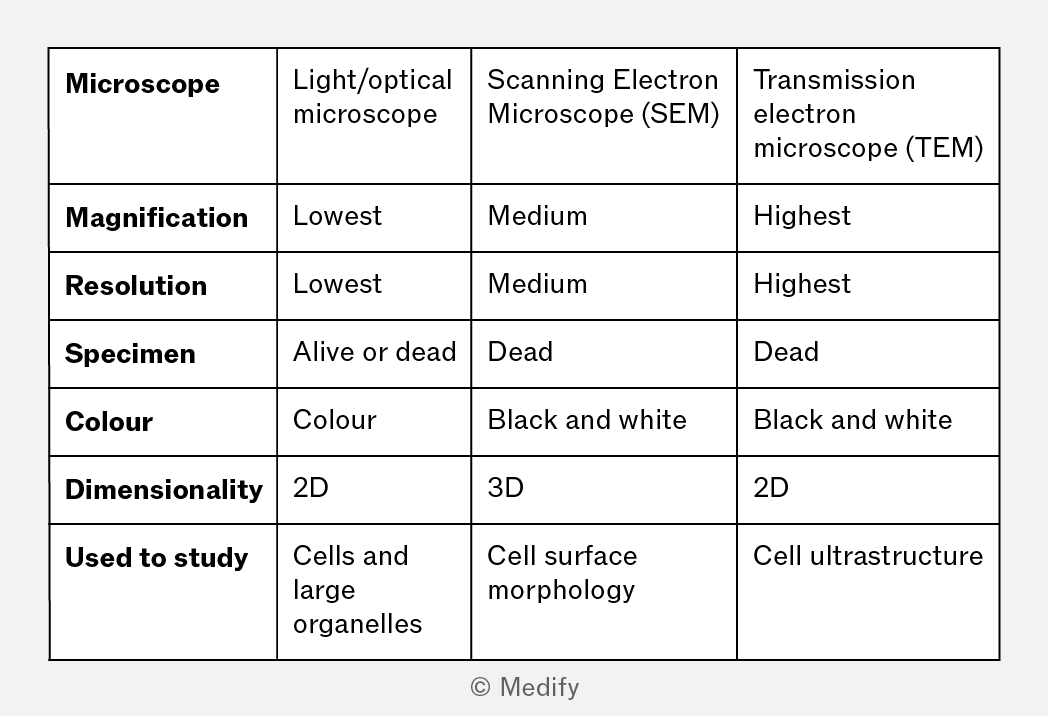
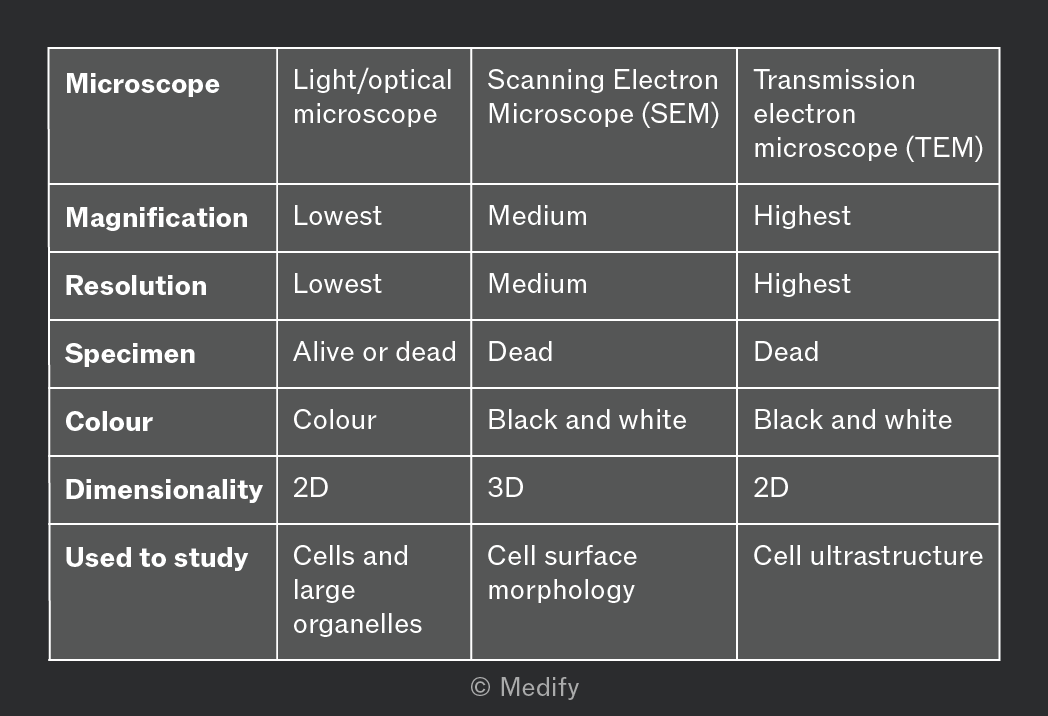
Light or optical microscopes use visible light that passes through or is reflected from a specimen.
Light microscopes:
- Generally have lower magnification and resolution than electron microscopes.
- Produce coloured images of living or dead specimens, often using stains to increase contrast.
- Can be used to observe cells and large organelles such as nuclei, cell walls, and chloroplasts.
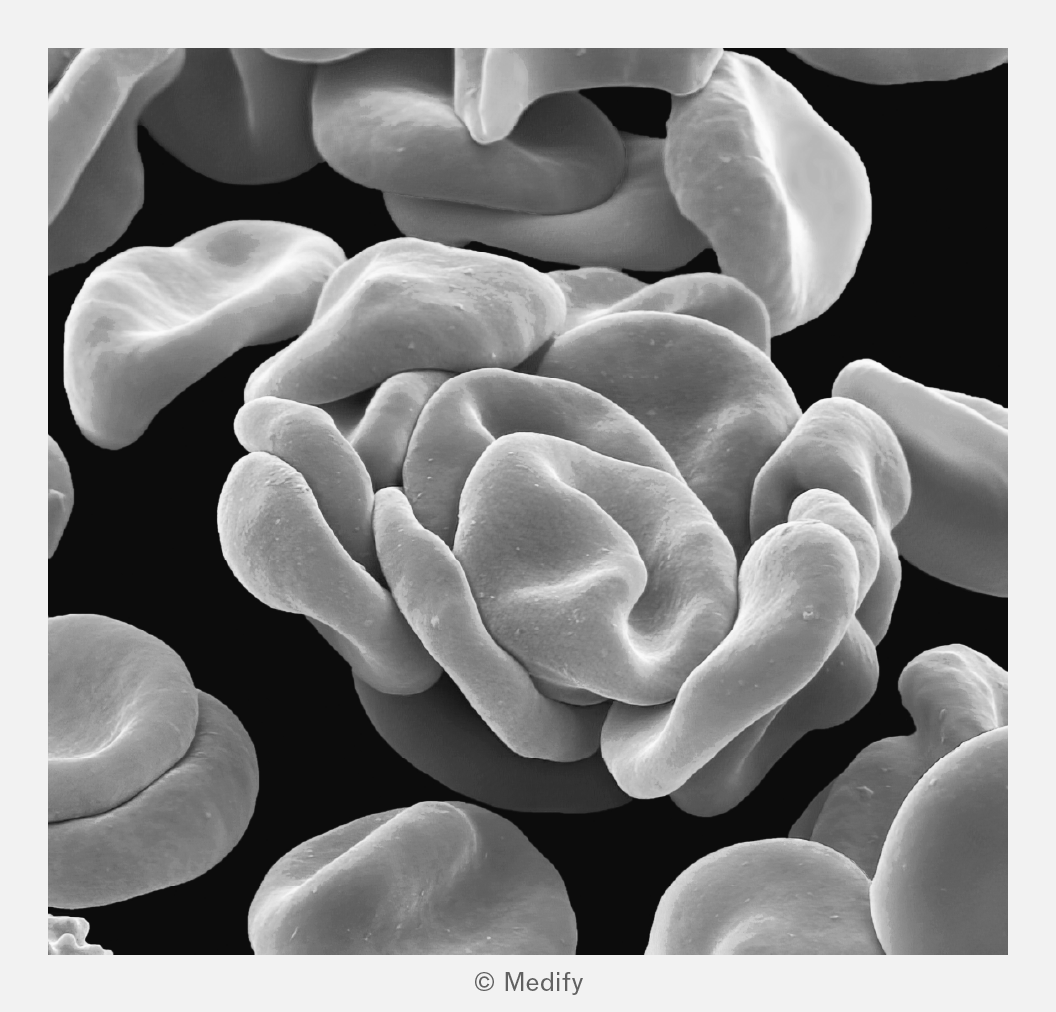
Scanning electron microscopes (SEM) scan a beam of electrons across the surface of a specimen. Secondary electrons emitted from the specimen are detected to form an image.
SEMs:
- Have higher resolution and magnification than light / optical microscopes, but lower than transmission electron microscopes (TEMs).
- Produce detailed 3D black-and-white images of a specimen’s surface. Specimens must be dead, prepared in a vacuum, and coated with hazardous heavy metals.
- Are used to study the morphology and topography of specimens.
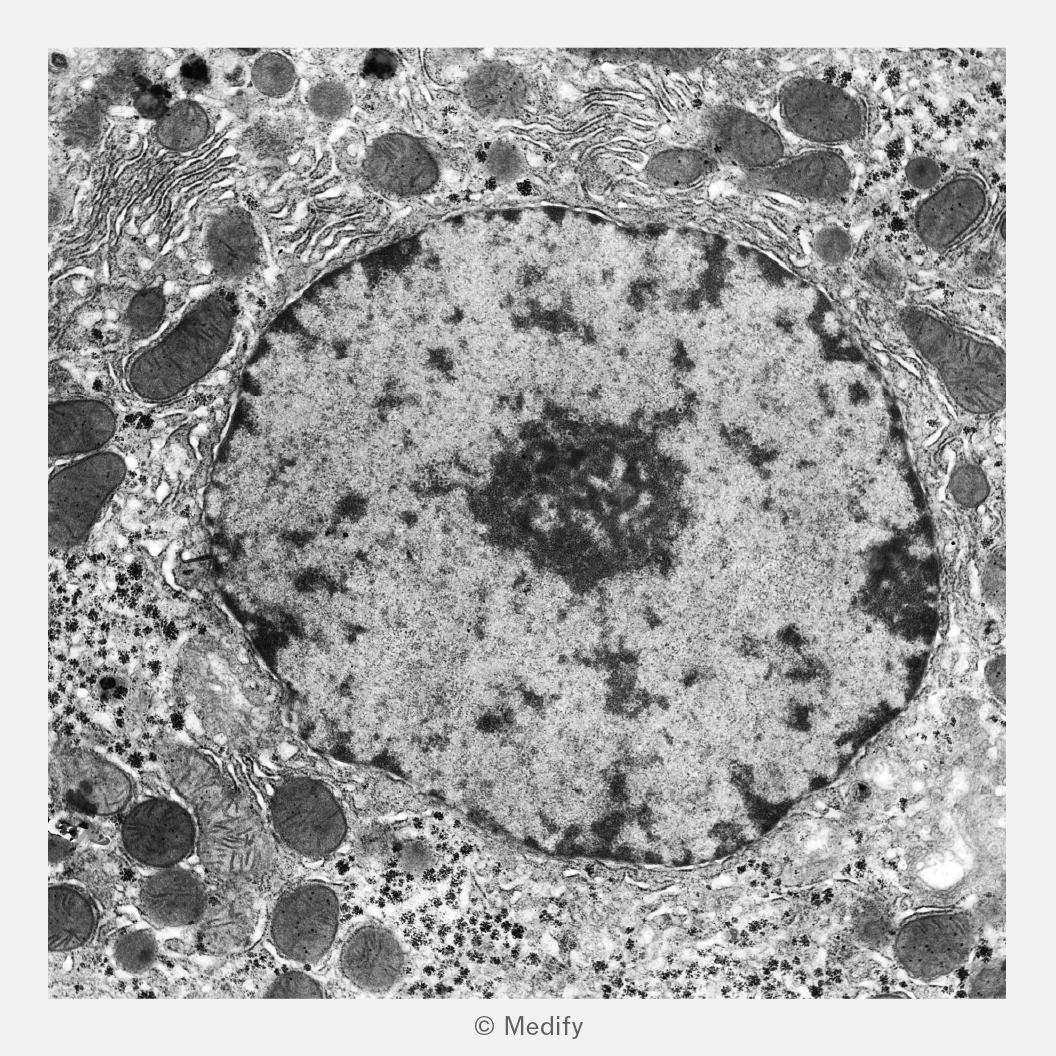
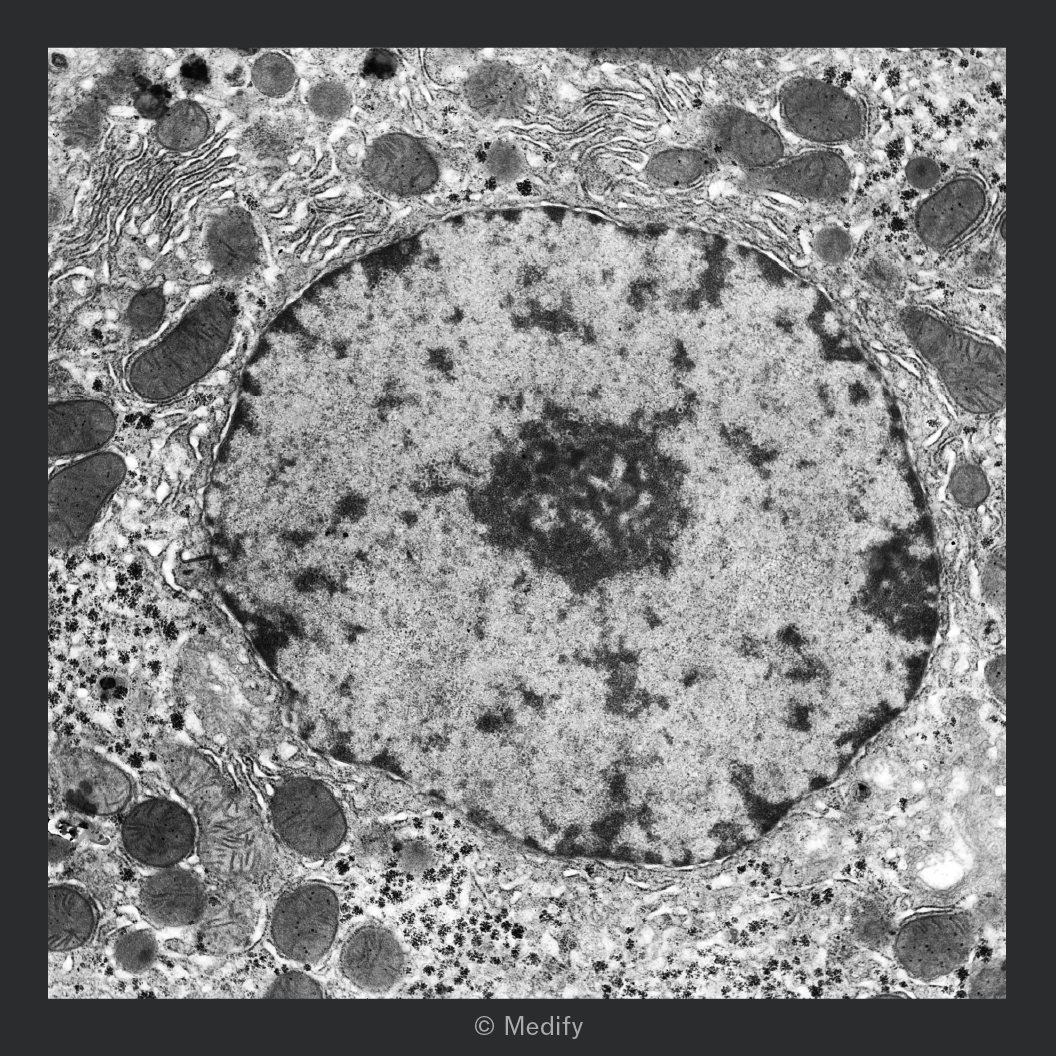
Transmission electron microscopes (TEMs) direct a beam of electrons through a very thin section of a specimen. Dense regions absorb or scatter more electrons and so appear darker in the image.
TEMs:
- Have the highest resolution and magnification compared to light / optical microscopes and SEMs.
- Produce black-and-white 2D images. Specimens must be dead and require complex preparation and thin sectioning.
- Allow detailed observation of internal cell ultrastructure (e.g., mitochondria, ER, ribosomes) and large biological molecules (e.g., proteins and DNA).
Proper slide preparation ensures that the specimen is visible, well-preserved, and appropriately stained for observation.
When using a light / optical microscope, light must be able to pass through specimens to effectively observe cells or organelles. When cutting a transverse or longitudinal section of a specimen, use a sharp blade to create thin slices that allow light to pass through.
Wet mounts involve suspending a specimen in a liquid such as water or saline on a microscope slide before carefully lowering a cover slip to avoid trapping air bubbles. They are useful for observing living organisms, thin tissues and processes.
Squash slides are a type of wet mount used to observe cell division in root tips. The specimen is gently pressed beneath a cover slip to spread the cells into a thin layer.
Dry mounts are prepared by placing a solid specimen directly onto a slide with a cover slip on top. They are commonly used for non-living specimens such as hair, pollen or plant material.
Artefacts are structures or features that appear in microscope images that are not actually present in the living cell.
They are usually caused by specimen preparation, for example, distortion during fixation and the introduction of air bubbles.
The mesosome was initially thought to be a membrane in prokaryotic cells. It’s now recognised as an artefact because it appears only in chemically fixed samples and is absent when bacteria are examined using modern techniques.
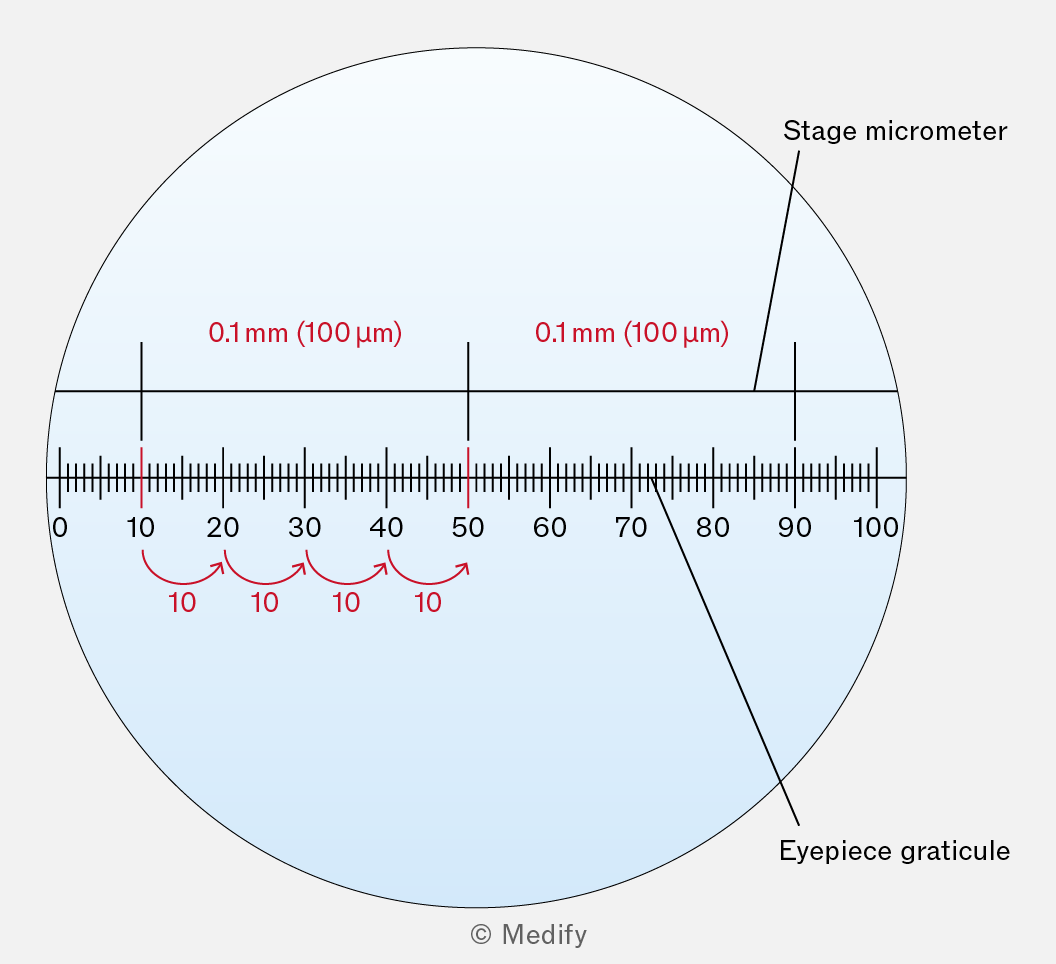
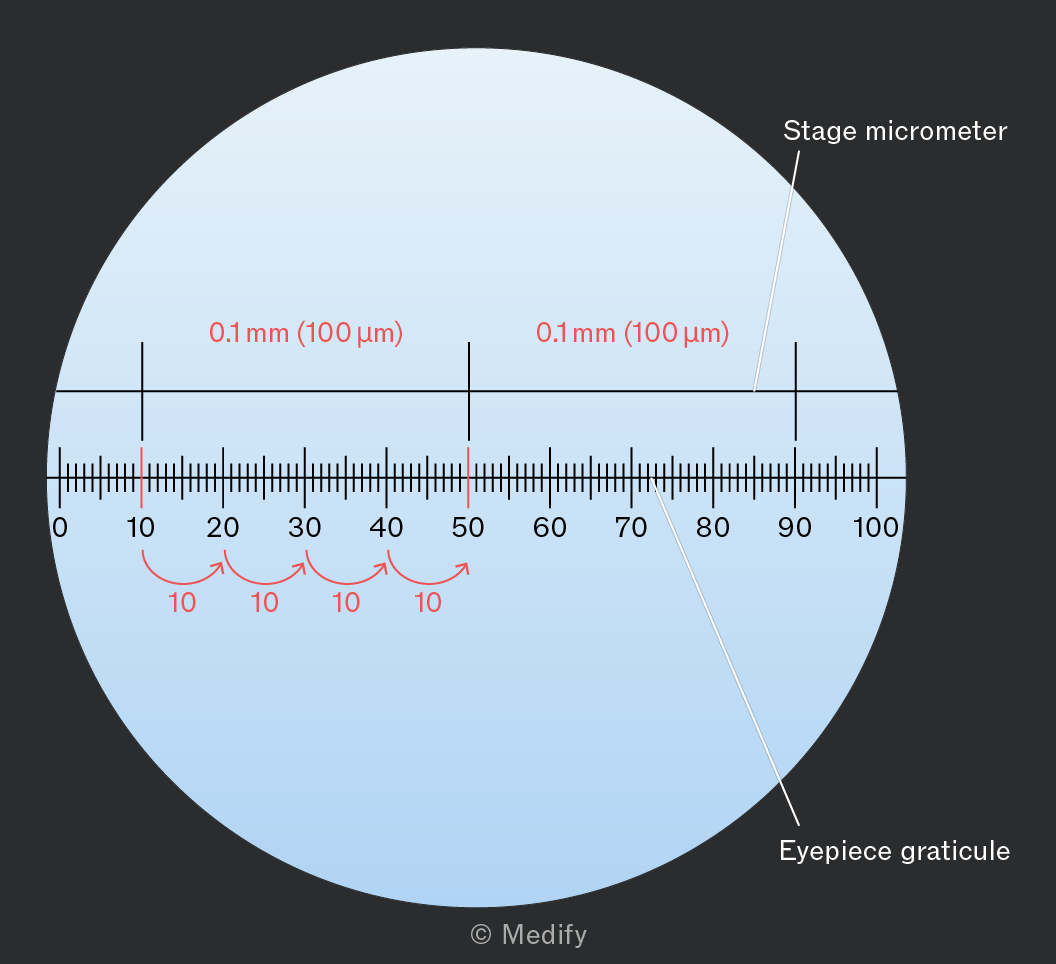
The true magnification produced by a microscope may differ from the stated magnification. Each lens is calibrated using an eyepiece graticule and stage micrometer.
The eyepiece graticule is a small scale (ruler) fitted inside the eyepiece. It has arbitrary units, so it must be calibrated for each objective lens magnification.
The stage micrometer is a microscope slide with a precisely defined scale (usually divided into 100 divisions, with each division equal to
To calibrate a light microscope lens:
- Place the stage micrometre and insert the eyepiece graticule.
- Focus the microscope so that the scales of both the stage micrometre and eyepiece graticule are visible, then align the scales.
- Determine how many eyepiece graticule divisions correspond to a known distance on the stage micrometer.
- Calculate the actual length represented by one eyepiece graticule division at that magnification (e.g., if one division on the stage micrometre () matches 10 divisions on the eyepiece graticule, then each graticule division equals
Once calibrated, the eyepiece graticule can be used to measure the size of structures in the specimen viewed under the same objective lens magnification.
Biological drawings are line drawings that focus on particular features of a specimen:
- Drawings should be accurate, reflecting the proportions of the observed structures as closely as possible.
- Ensure that the drawing is centrally placed on the page, with sufficient space for labels.
- Use as much of the paper as possible.
- Include a title / heading.
- Using a sharp pencil, draw using continuous lines with no shading, on plain paper.
- Draw clearly defined structures.
- Include a scale bar.
- State the magnification used.
- Label lines should be drawn with a ruler and should not overlap each other.
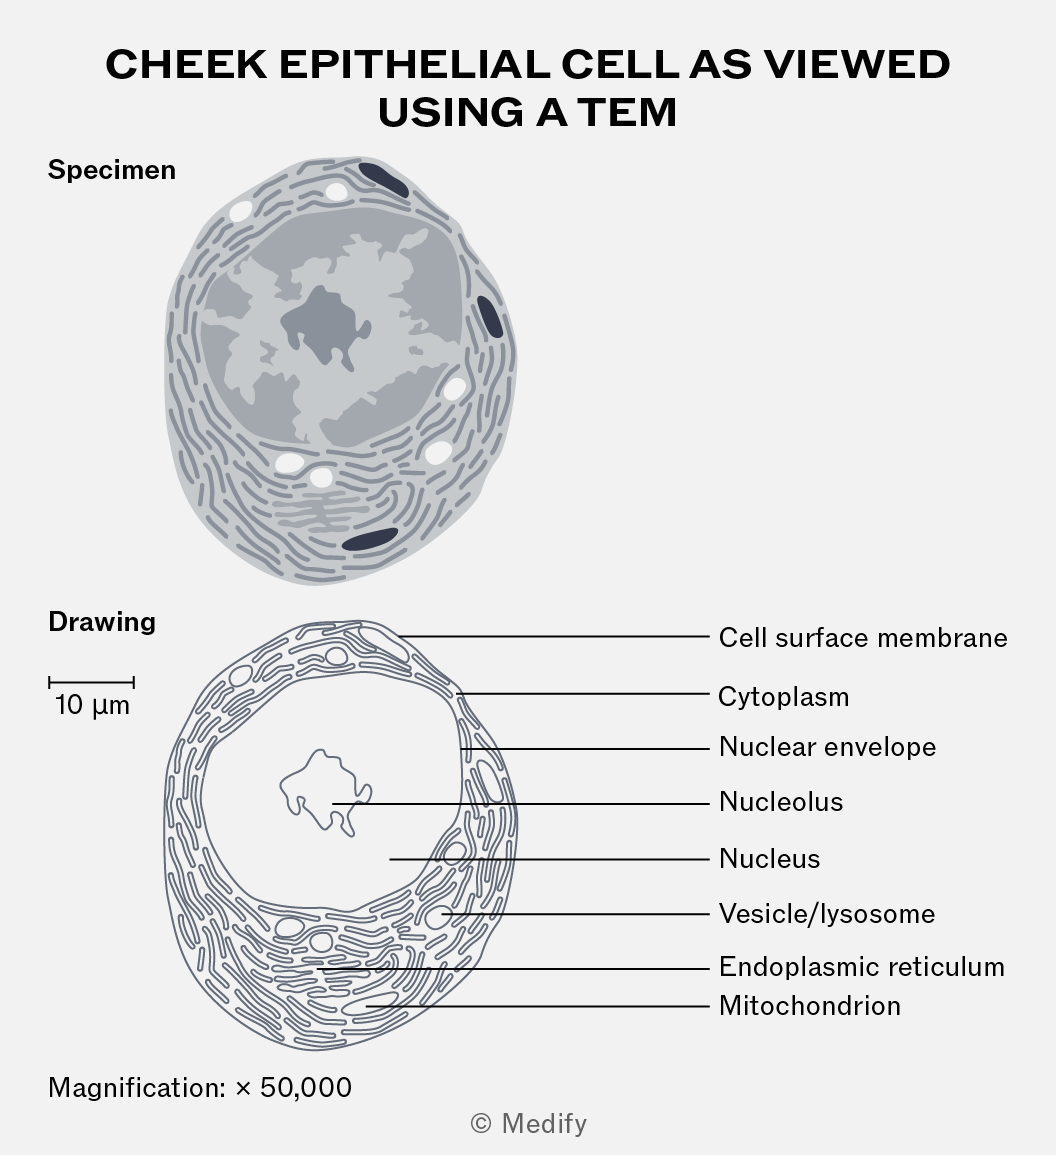
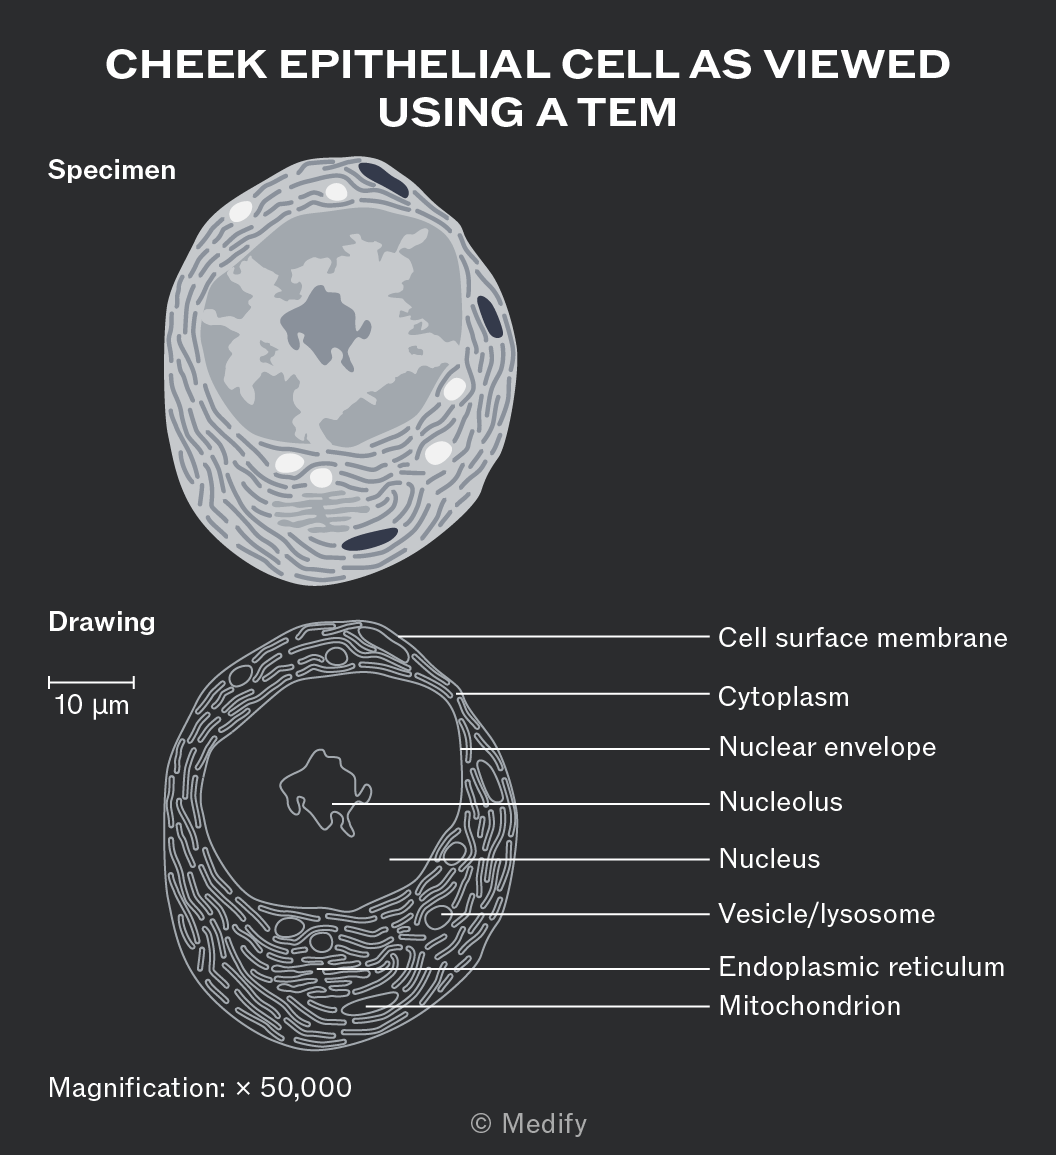
Total magnification describes how much larger an object appears under the microscope compared to its actual size.
The formula used to calculate magnification is:
Where image size is the size of the image produced by the microscope and actual size is the true size of the object or specimen.
Magnification refers to how much larger an image is compared to the actual size of the object being viewed. Higher magnification values mean the image appears more enlarged compared to the real object.
Resolution (also called resolving power) refers to the ability to distinguish two close points as separate, determining the level of detail that can be seen in the image. Smaller values indicate higher resolution because two objects can be very close together and still be seen as separate entities.
Cell fractionation is a laboratory technique used to extract individual organelles from cells and study their morphology or function.
The process involves three key steps:
- Homogenisation
- Filtration
- Ultracentrifugation.
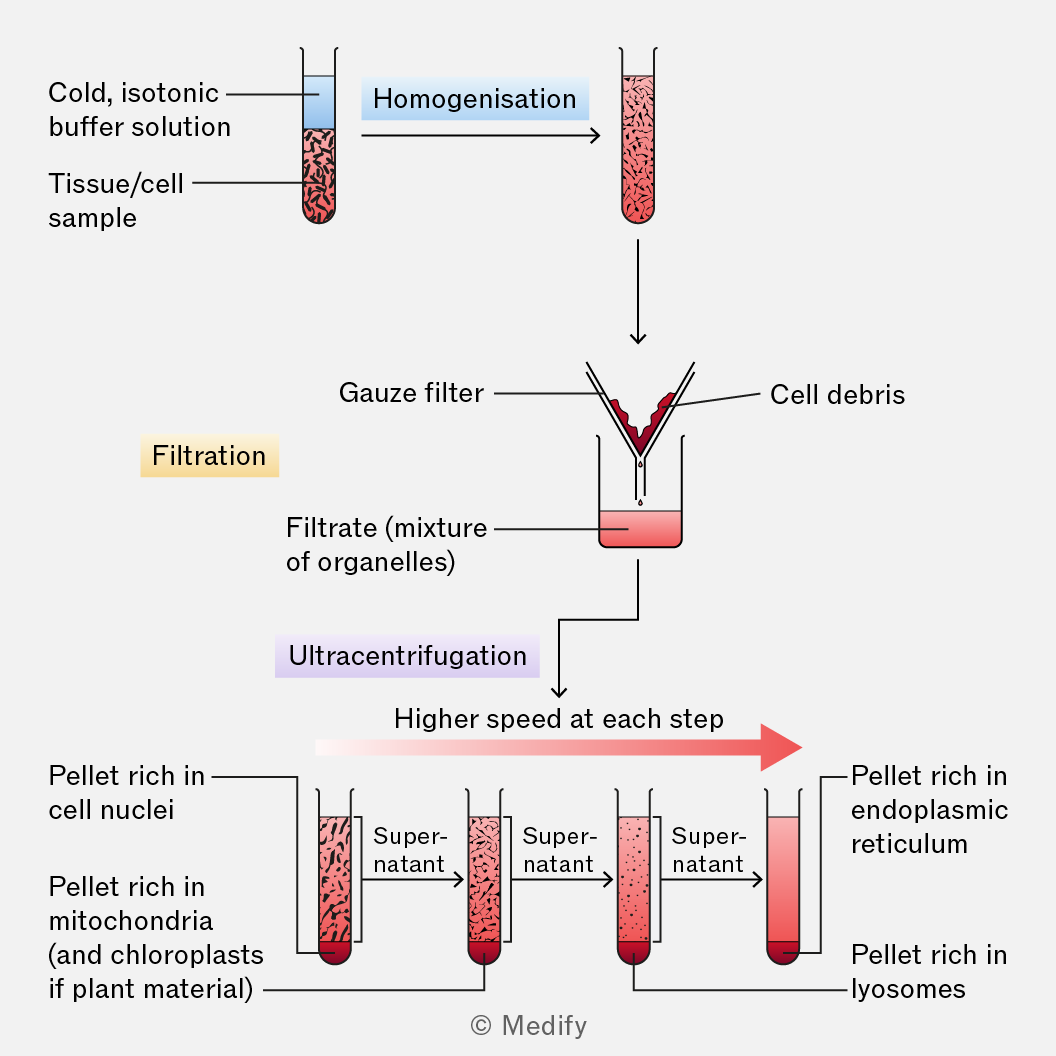
The first step in cell fractionation is homogenisation where cells are broken apart using a device called a homogeniser (similar to a blender). This releases the organelles into a fluid mixture called the homogenate.
The procedure is carried out in a solution that is:
- Cold – to reduce enzyme activity that might break down organelles.
- Isotonic – has the same water potential as the cell to prevent organelles from bursting or shrinking due to osmosis.
- Buffered – keeps the stable, preventing damage to proteins and enzymes.
The second step in cell fractionation is filtration where the homogenate is passed through a fine gauze.
This removes large pieces of debris (e.g., cell walls, unbroken cells). The filtrate that passes through contains the suspended organelles.
The third step in cell fractionation is ultracentrifugation. This involves transferring the filtrate to tubes and placing them in a centrifuge, which spins samples at high speeds to separate components by mass, size and density.
- Heavier organelles (e.g., nucleus and chloroplasts) are forced to the bottom of the tube, forming a pellet.
- The supernatant (remaining liquid) contains lighter organelles (e.g., ribosomes) and is poured off and re-spun at higher speeds.
- This step is repeated multiple times at increasing speeds, gradually separating organelles from heaviest to lightest.