Module 1: Practical chemistry for exams›PAG 6.2 - Preparation of benzoic acid

PAG 6.2 - Preparation of benzoic acid

An overview of PAG 6.2 - Preparation of benzoic acid
7 min

In OCR Chemistry Required Practical 6 (PAG 6.2), benzoic acid is prepared from methyl benzoate and purified.

The process begins with the alkaline hydrolysis of the liquid ester, methyl benzoate.

Acidification of the product forms solid benzoic acid, which is then purified by recrystallisation.

The analysis of the solids formed during the experiment is done using thin-layer chromatography and melting point determination.

Add to favourites

In OCR PAG 6.2: Preparation of benzoic acid, there are several important safety requirements to be aware of (beyond normal lab practice such as wearing goggles).

  • Several chemicals are harmful if inhaled – complete the practical in a well-ventilated area.
  • Immediately clean up any spills of acid or alkali.
Add to favourites

Experimental method for OCR Chemistry Required Practical 6 (PAG 6.2)

Part 1 – Hydrolysis of methyl benzoate.
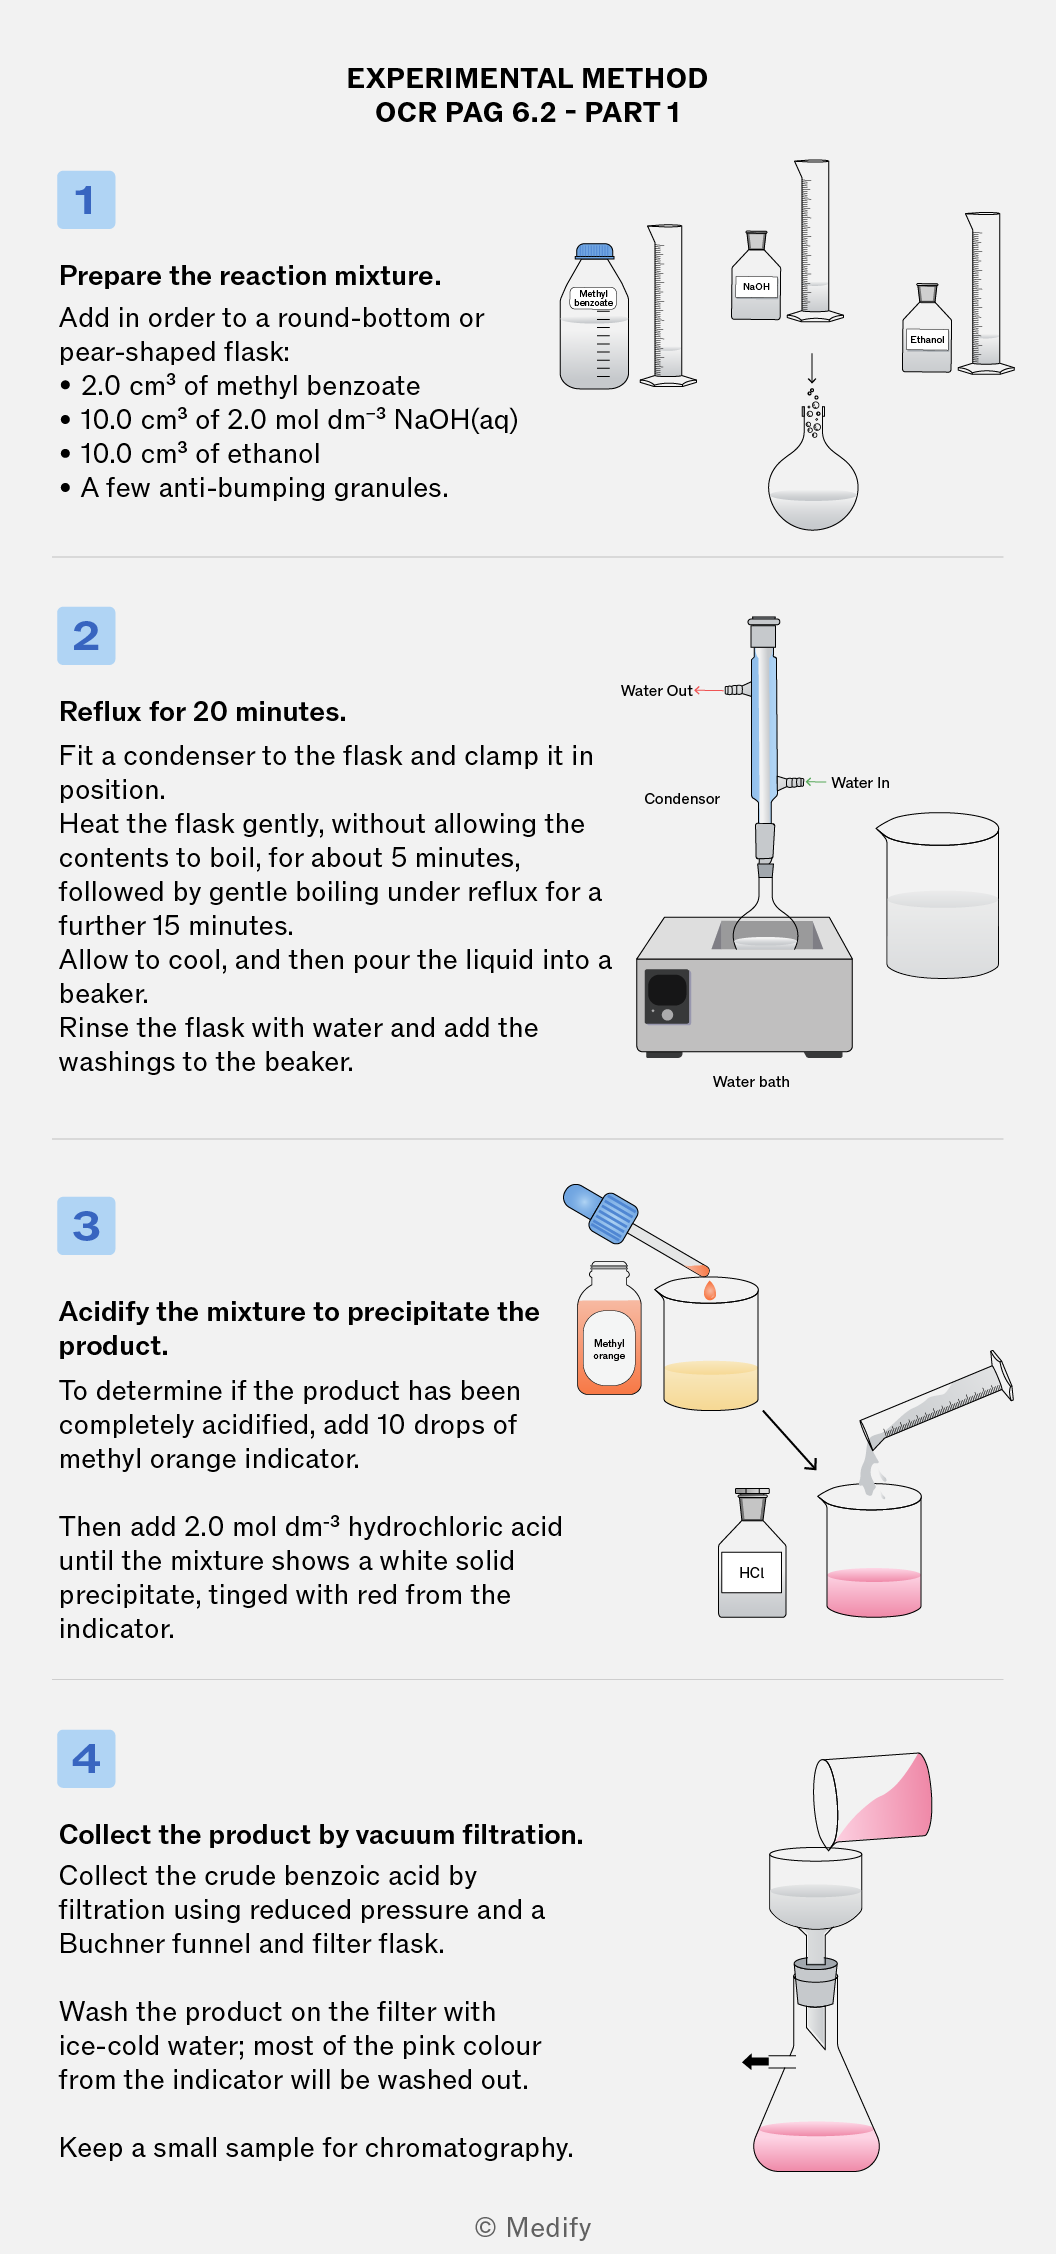
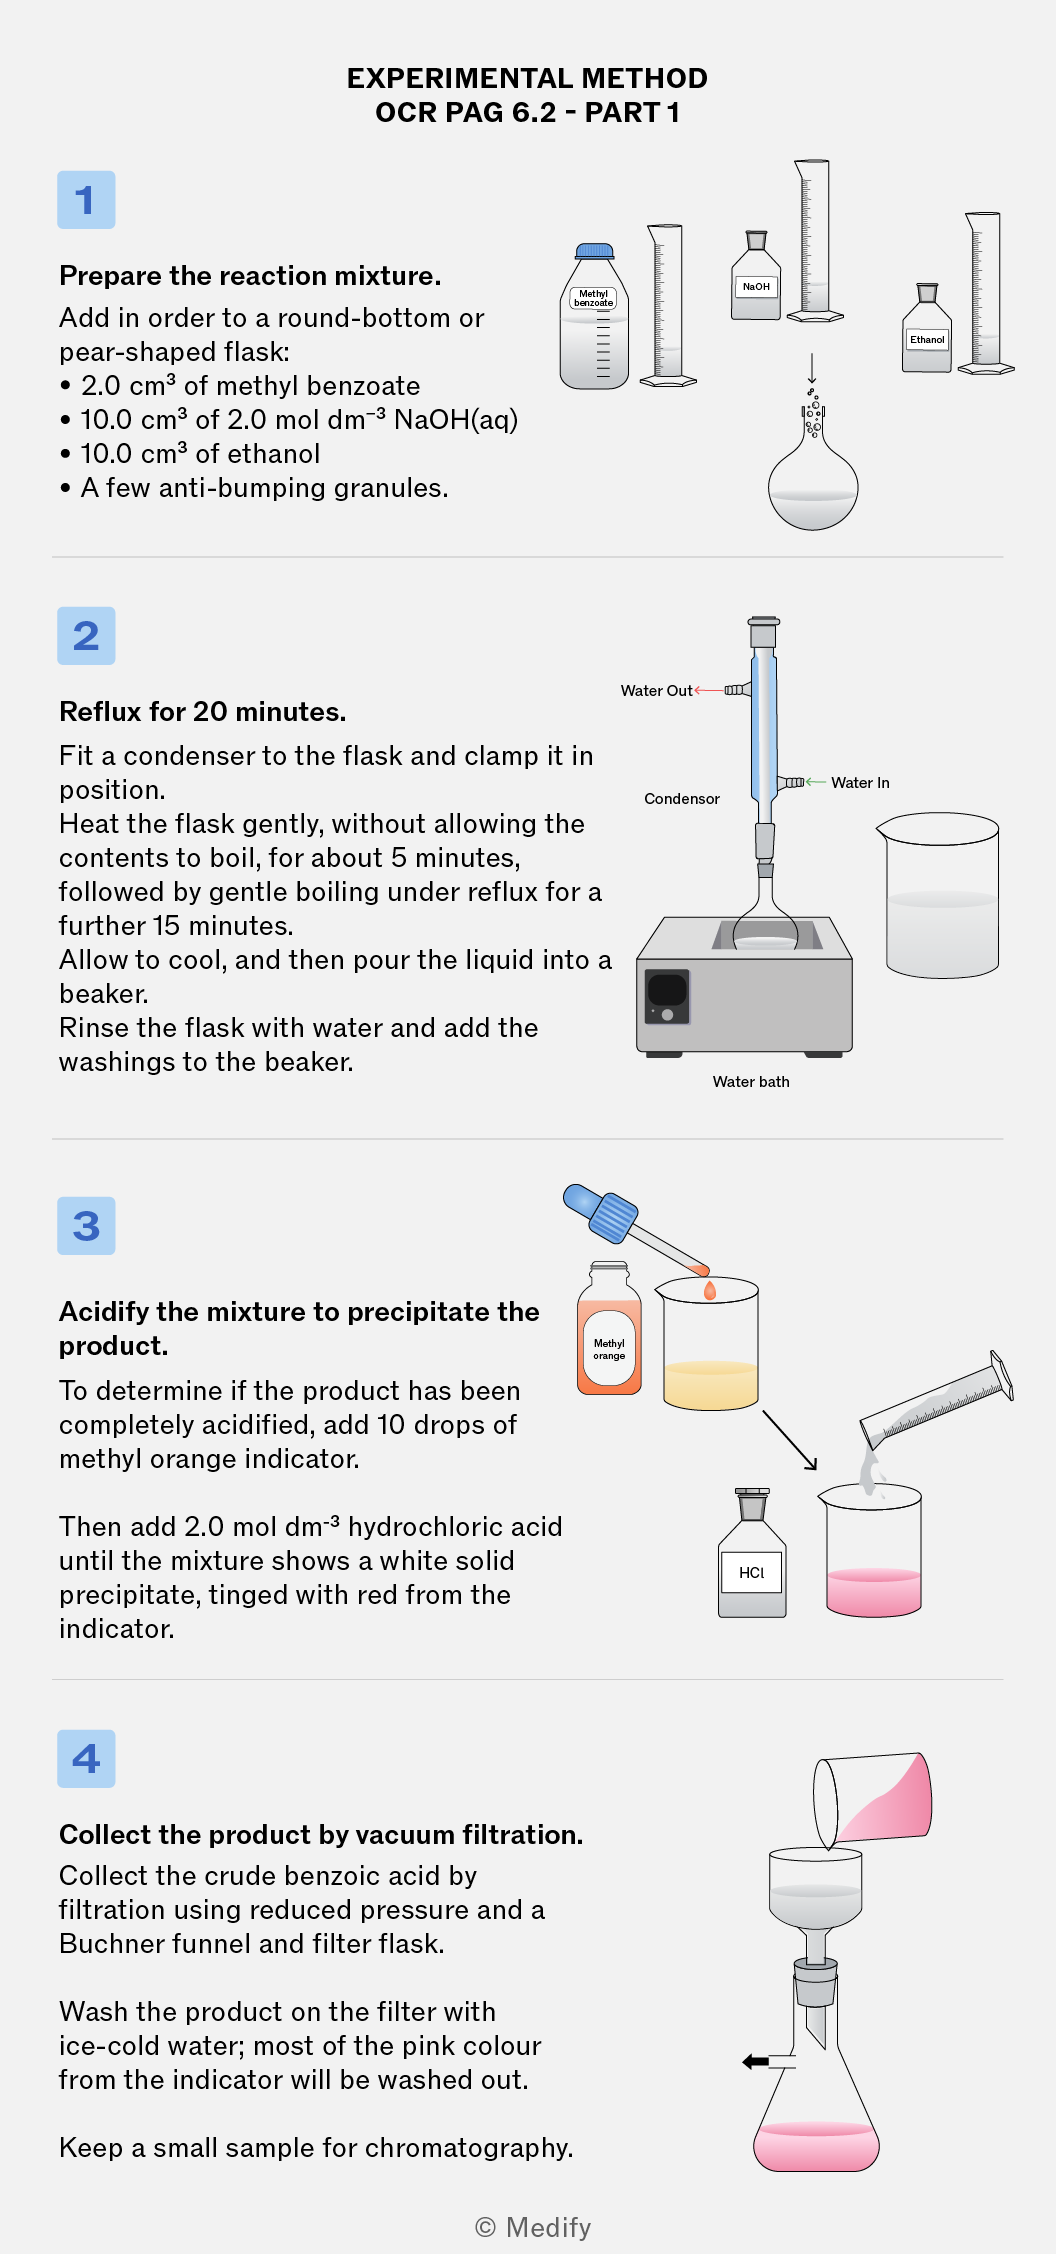
EXPERIMENTAL METHOD OCR PAG 6.2 - PART 1. 1. Prepare the reaction mixture. Add in order to a round-bottom or pear-shaped flask: • 2.0 cm³ of methyl benzoate • 10.0 cm³ of 2.0 mol dm⁻³ NaOH(aq) • 10.0 cm³ of ethanol • A few anti-bumping granules. 2. Reflux for 20 minutes. Fit a condenser to the flask and clamp it in position. Heat the flask gently, without allowing the contents to boil, for about 5 minutes, followed by gentle boiling under reflux for a further 15 minutes. Allow to cool, and then pour the liquid into a beaker. Rinse the flask with water and add the washings to the beaker. 3. Acidify the mixture to precipitate the product. To determine if the product has been completely acidified, add 10 drops of methyl orange indicator. Then add 2.0 mol dm⁻³ hydrochloric acid until the mixture shows a white solid precipitate, tinged with red from the indicator. 4. Collect the product by vacuum filtration. Collect the crude benzoic acid by filtration using reduced pressure and a Buchner funnel and filter flask. Wash the product on the filter with ice-cold water; most of the pink colour from the indicator will be washed out. Keep a small sample for chromatography.
Add to favourites

Experimental method for OCR Chemistry Required Practical 6 (PAG 6.2)

Part 2 – Recrystalisation and melting point determination.
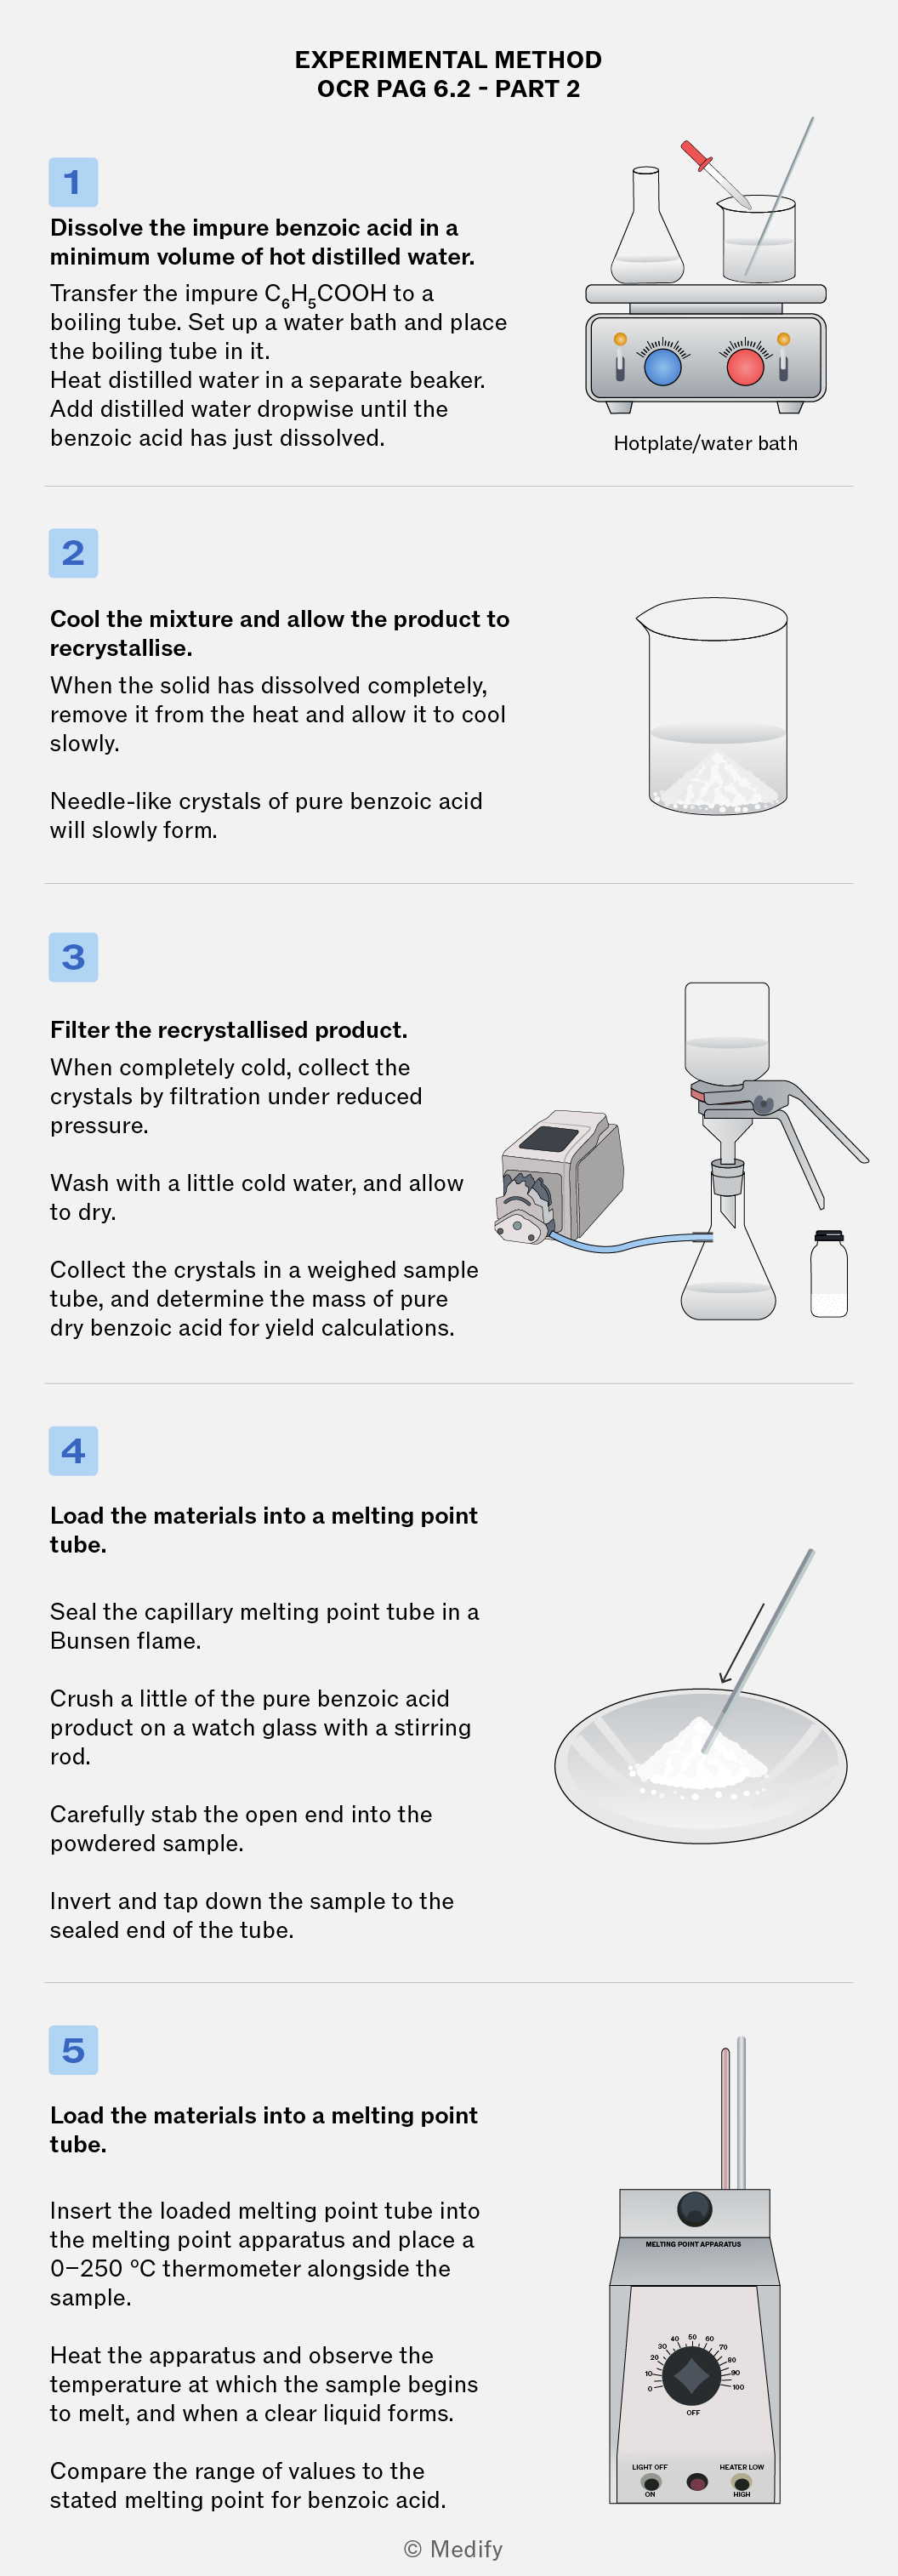
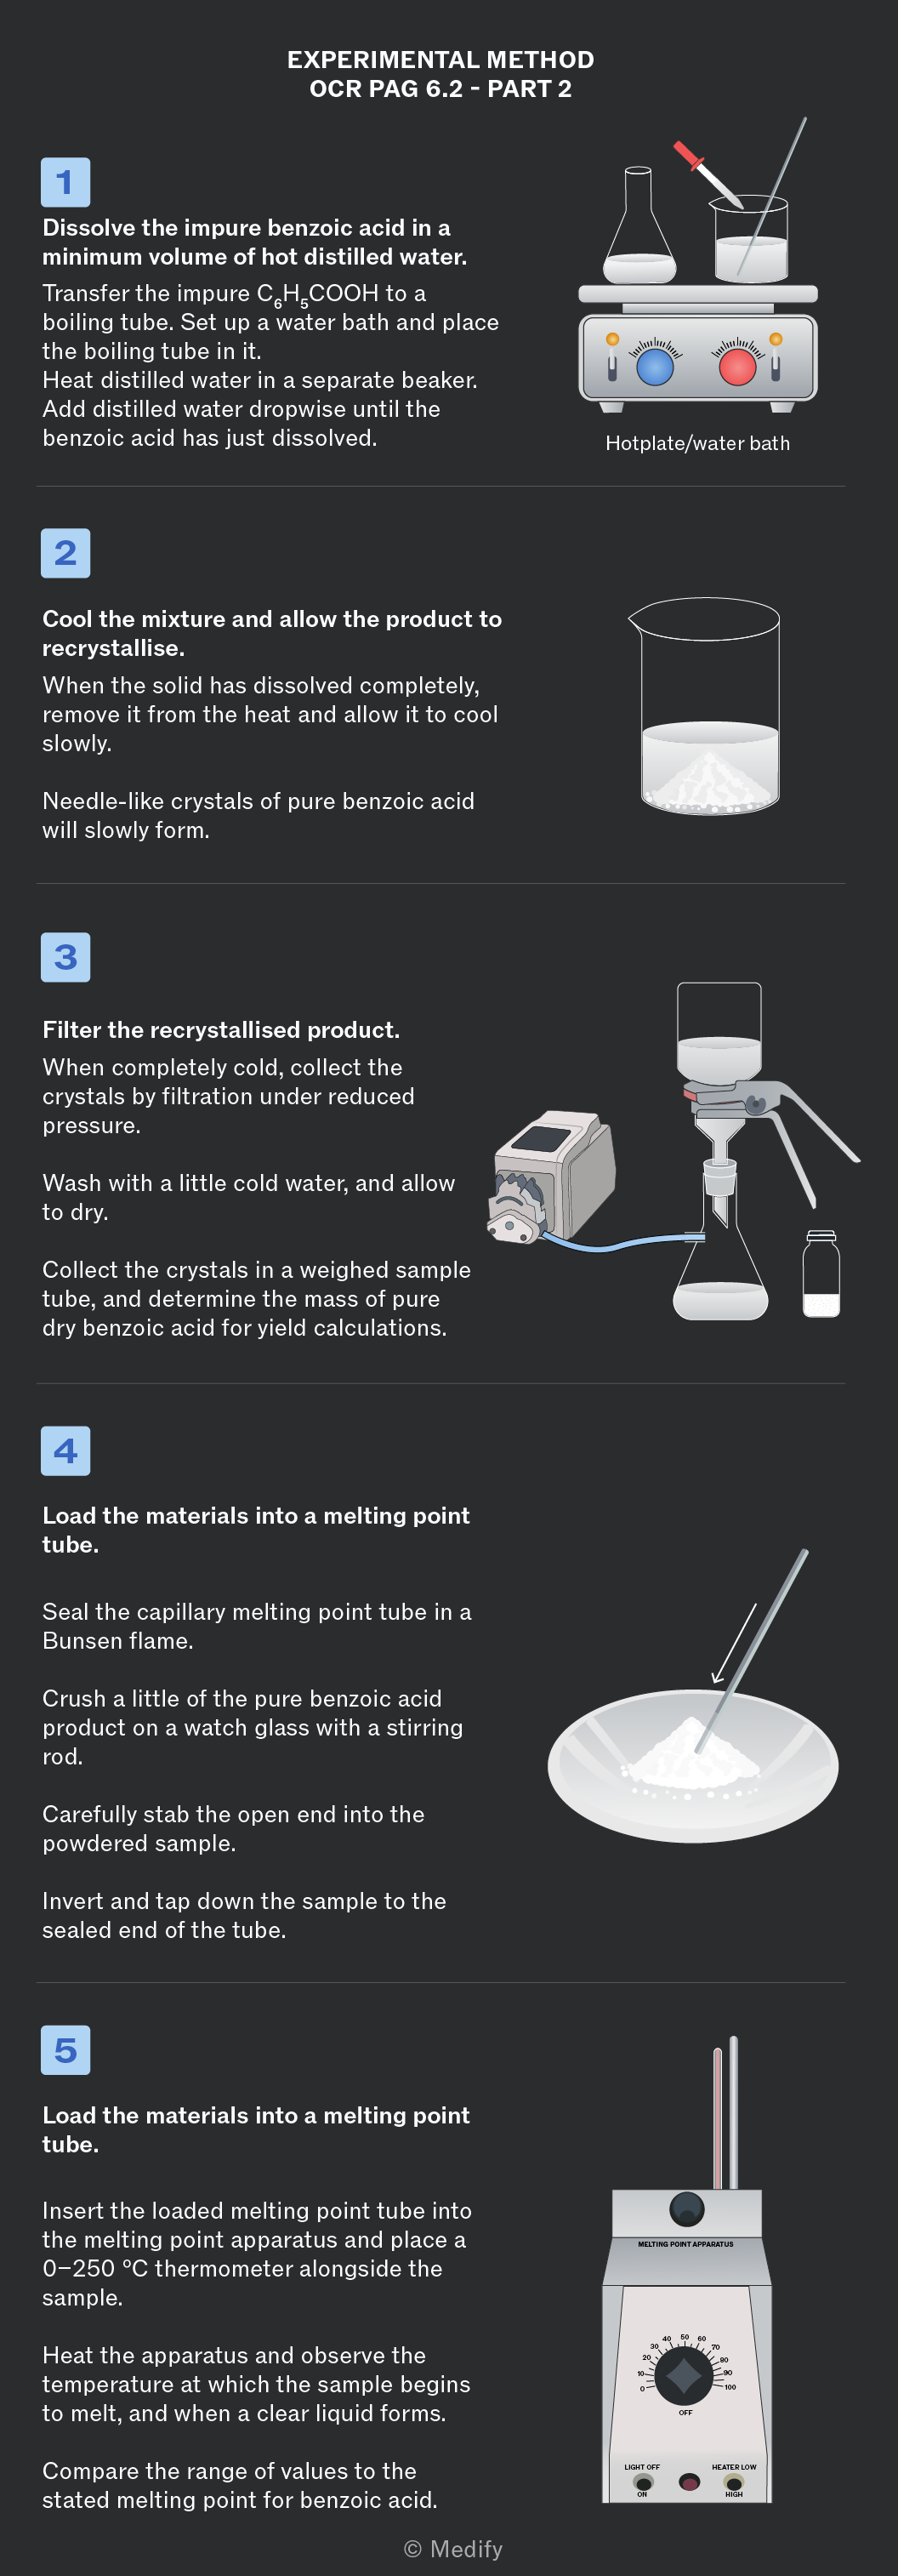
EXPERIMENTAL METHOD OCR PAG 6.2 - PART 2. 1. Dissolve the impure benzoic acid in a minimum volume of hot distilled water. Transfer the impure C6H5COOH to a boiling tube. Set up a water bath and place the boiling tube in it. Heat distilled water in a separate beaker. Add distilled water dropwise until the benzoic acid has just dissolved. 2. Cool the mixture and allow the product to recrystallise. When the solid has dissolved completely, remove it from the heat and allow it to cool slowly. Needle-like crystals of pure benzoic acid will slowly form. 3. Filter the recrystallised product. When completely cold, collect the crystals by filtration under reduced pressure. Wash with a little cold water, and allow to dry. Collect the crystals in a weighed sample tube, and determine the mass of pure dry benzoic acid for yield calculations. 4. Load the materials into a melting point tube. Seal the capillary melting point tube in a Bunsen flame. Crush a little of the pure benzoic acid product on a watch glass with a stirring rod. Carefully stab the open end into the powdered sample. Invert and tap down the sample to the sealed end of the tube. 5. Load the materials into a melting point tube. Insert the loaded melting point tube into the melting point apparatus and place a 0–250 °C thermometer alongside the sample. Heat the apparatus and observe the temperature at which the sample begins to melt, and when a clear liquid forms. Compare the range of values to the stated melting point for benzoic acid. © Medify
Add to favourites

Experimental method for OCR Chemistry Required Practical 6 (PAG 6.2)

Part 3 – TLC analysis.
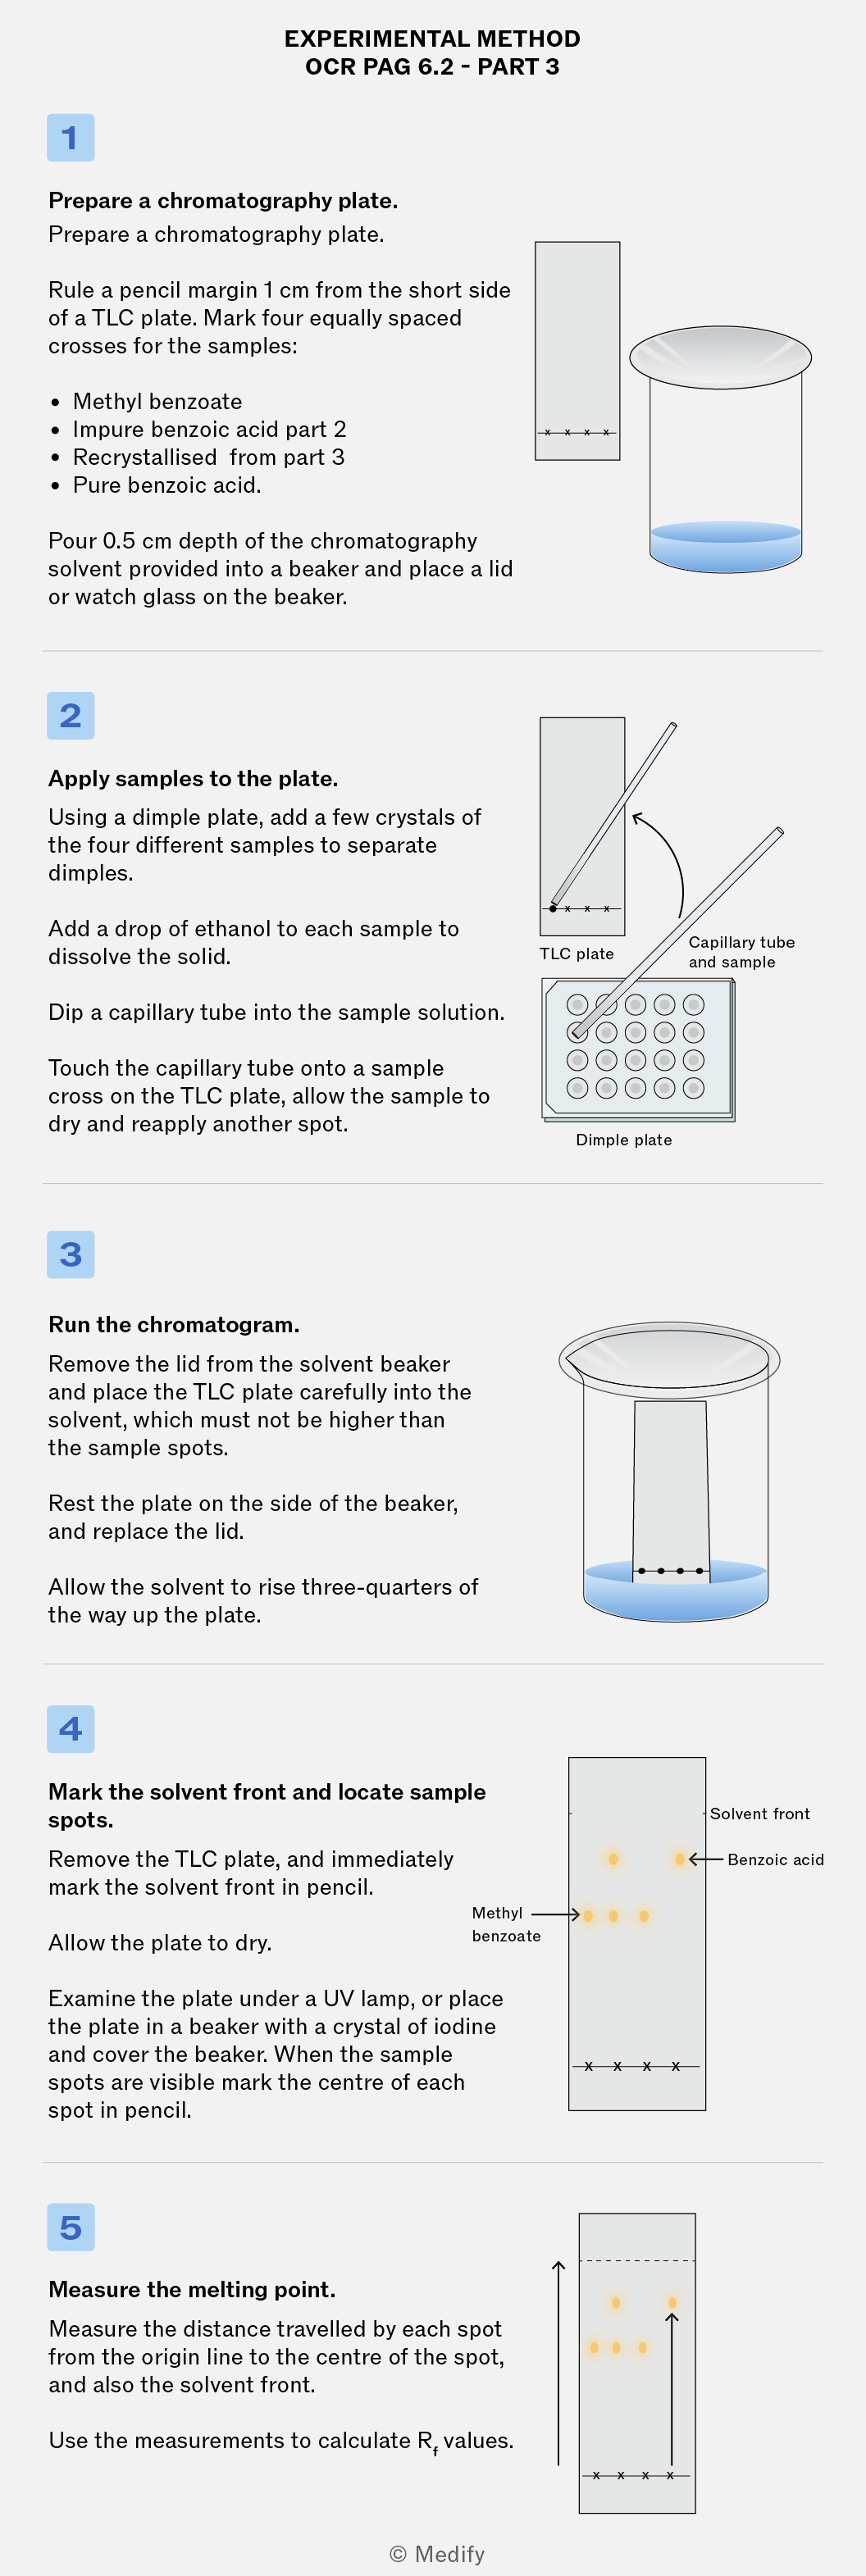
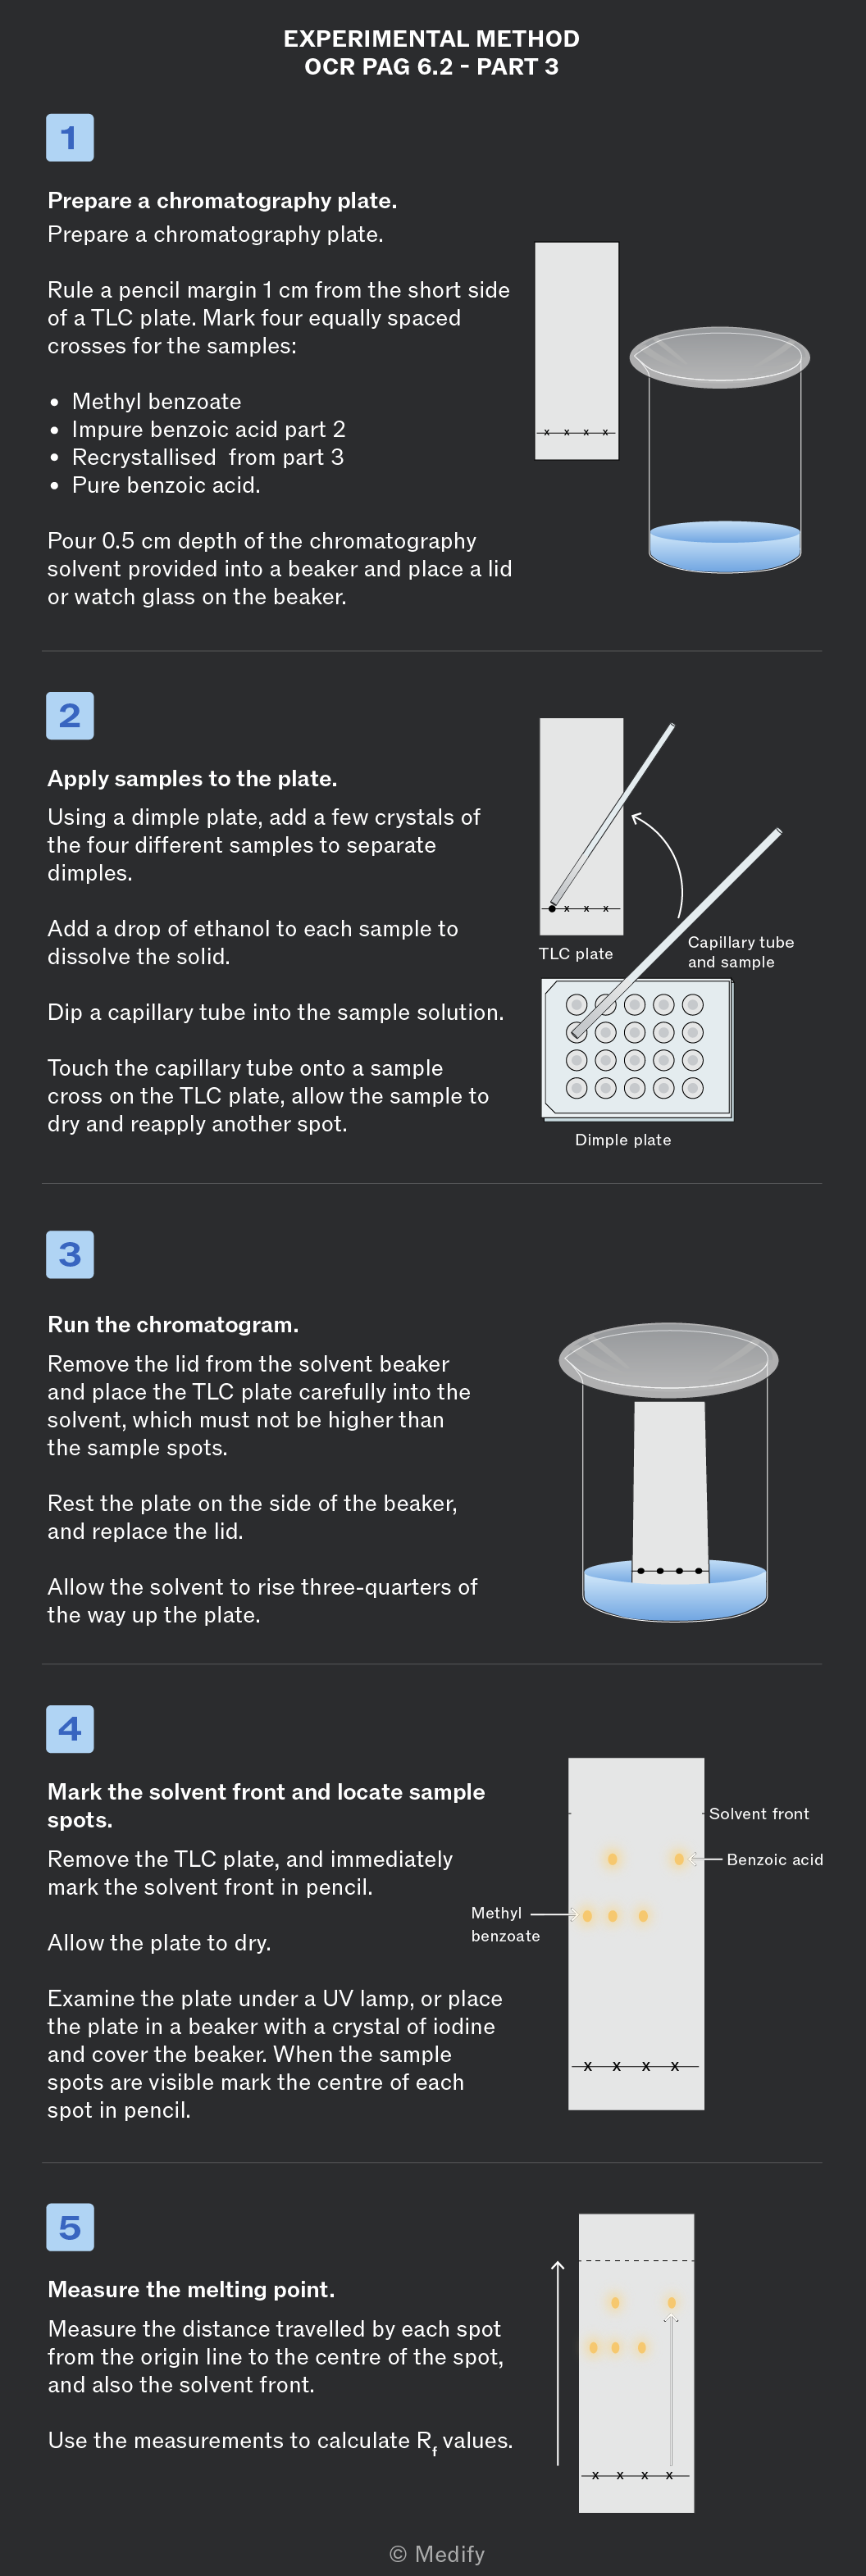
EXPERIMENTAL METHOD OCR PAG 6.2 - PART 3. 1. Prepare a chromatography plate. Prepare a chromatography plate. Rule a pencil margin 1 cm from the short side of a TLC plate. Mark four equally spaced crosses for the samples: Methyl benzoate, Impure benzoic acid part 2, Recrystallised from part 3, Pure benzoic acid. Pour 0.5 cm depth of the chromatography solvent provided into a beaker and place a lid or watch glass on the beaker. 2. Apply samples to the plate. Using a dimple plate, add a few crystals of the four different samples to separate dimples. Add a drop of ethanol to each sample to dissolve the solid. Dip a capillary tube into the sample solution. Touch the capillary tube onto a sample cross on the TLC plate, allow the sample to dry and reapply another spot. 3. Run the chromatogram. Remove the lid from the solvent beaker and place the TLC plate carefully into the solvent, which must not be higher than the sample spots. Rest the plate on the side of the beaker, and replace the lid. Allow the solvent to rise three-quarters of the way up the plate. 4. Mark the solvent front and locate sample spots. Remove the TLC plate, and immediately mark the solvent front in pencil. Allow the plate to dry. Examine the plate under a UV lamp, or place the plate in a beaker with a crystal of iodine and cover the beaker. When the sample spots are visible mark the centre of each spot in pencil. 5. Measure the melting point. Measure the distance travelled by each spot from the origin line to the centre of the spot, and also the solvent front. Use the measurements to calculate Rf values.
Add to favourites

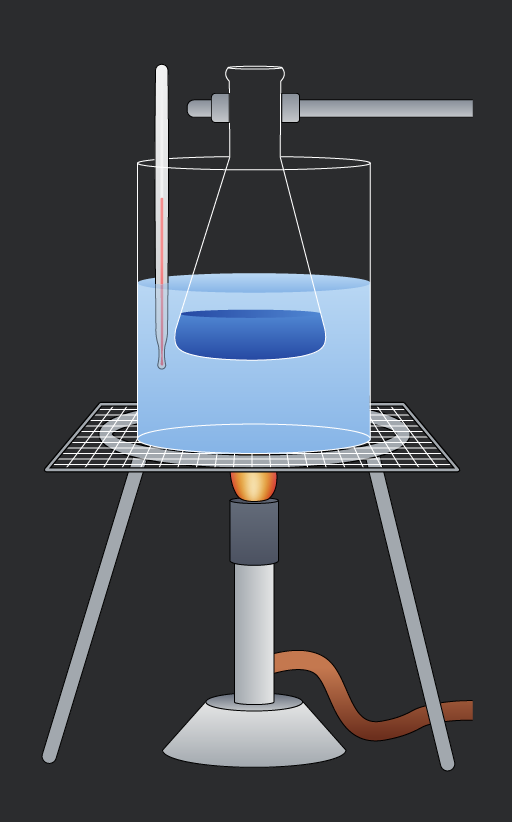
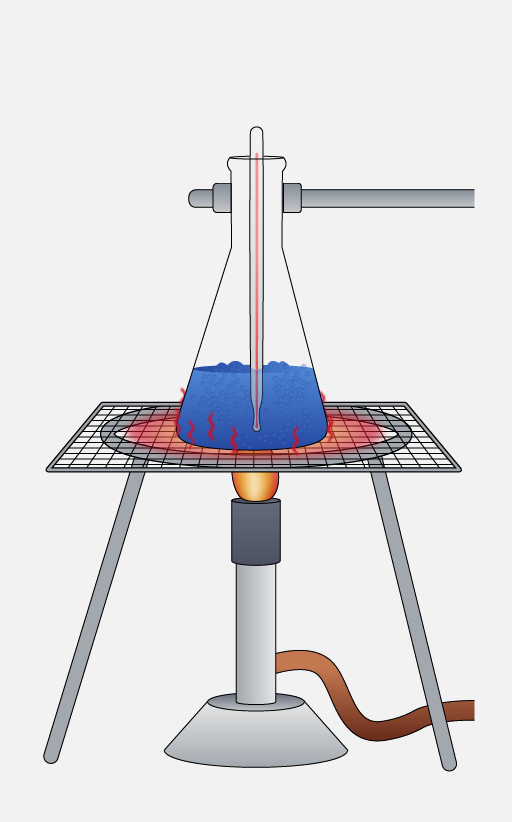
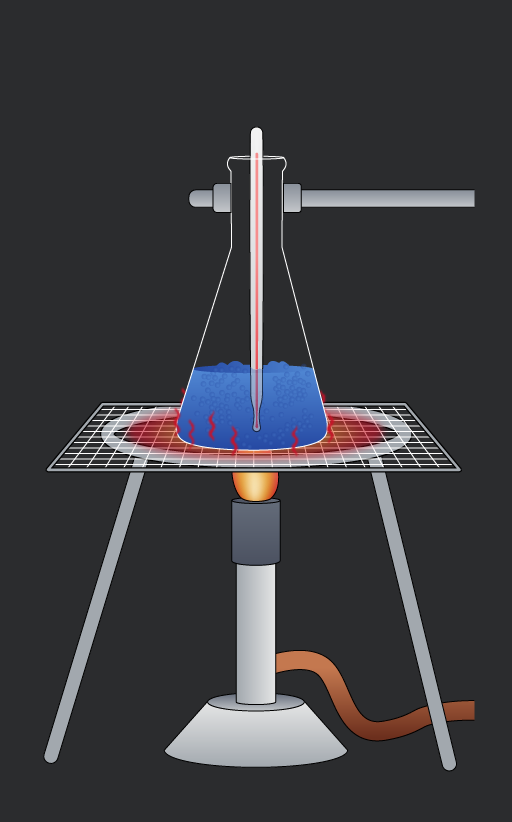
Temperature control in the preparation of aspirin is essential.
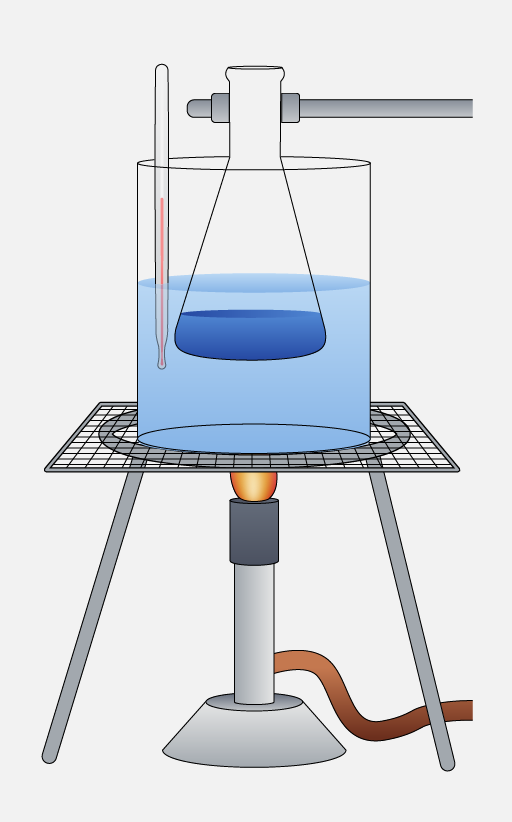
A laboratory setup featuring a beaker filled with blue liquid, a thermometer inserted into the beaker, and a Bunsen burner underneath the beaker, all resting on a wire mesh support.
Do

Monitor the temperature carefully, using a water bath and ensuring it does not exceed 65 °C to avoid decomposing

A laboratory setup showing a conical flask containing blue liquid, placed on a wire mesh over a Bunsen burner. The burner is lit, producing a flame underneath the flask, and there are red wavy lines indicating heat.
Don't

Allow the temperature to rise above 65 °C – overheating may degrade the aspirin product.

Add to favourites

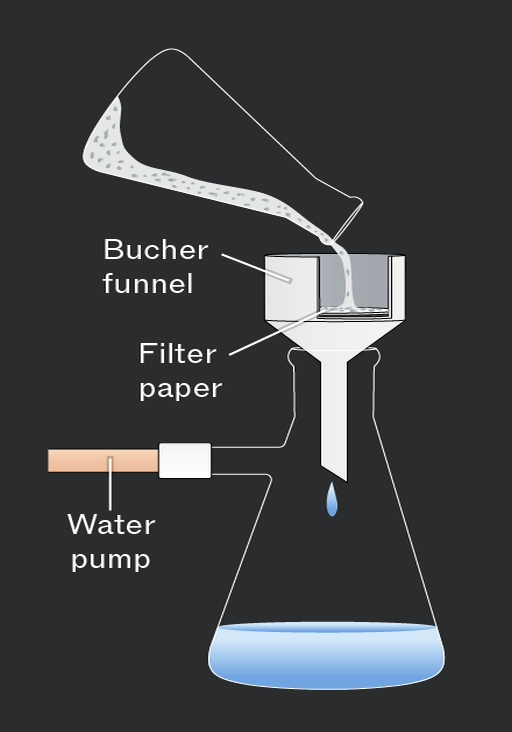
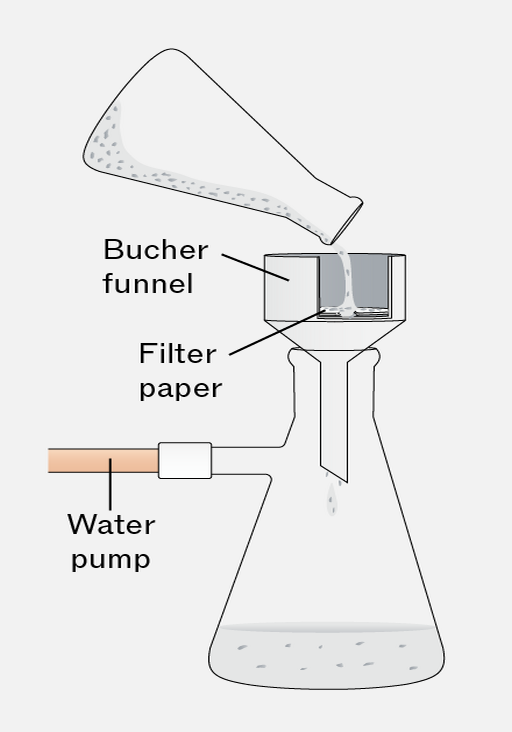
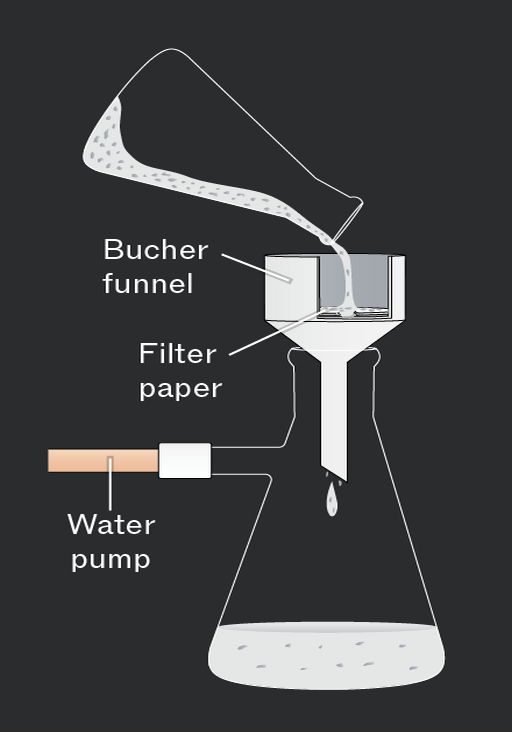
Take care when filtering the aspirin product under reduced pressure.
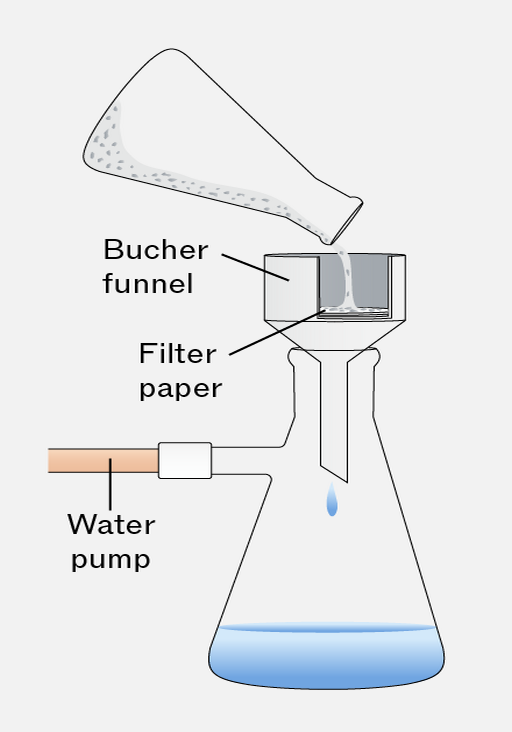
A diagram illustrating a Bucher funnel setup. The image includes a Bucher funnel at the top, with filter paper inside it. Below, a flask is connected to a water pump, and a drop of liquid is shown falling from the funnel into the flask.
Do

Filter the aspirin gently under reduced pressure to collect the solid efficiently. Dampening the filter paper and starting the suction before adding the reaction mixture creates a good seal.

A diagram illustrating a Bucher funnel setup, with labeled components including a Bucher funnel, filter paper, and a water pump connected to a flask.
Don't

Apply excessive force during filtration – this could cause the filter paper to tear and the solid to be sucked through to the collection vessel.

Add to favourites

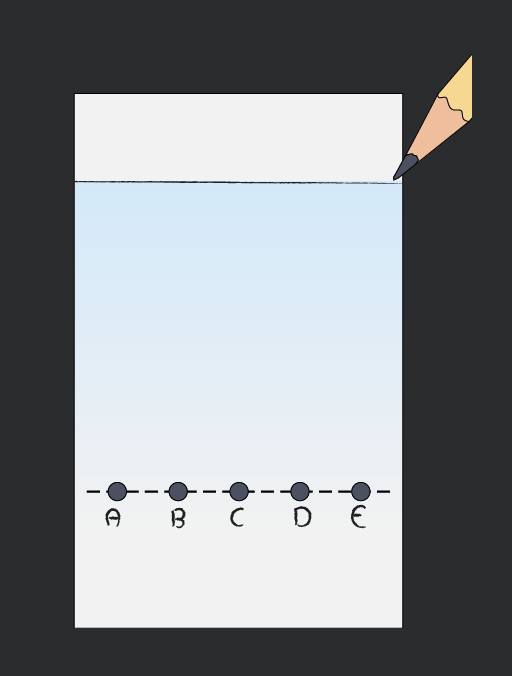
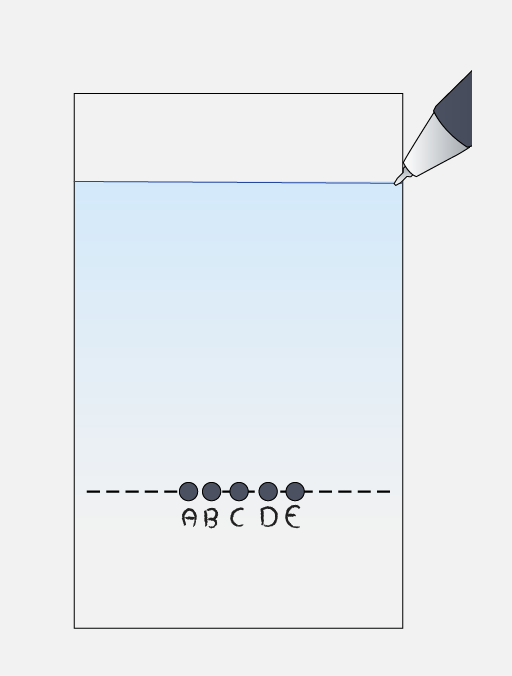
Best practice when preparing a TLC plate.
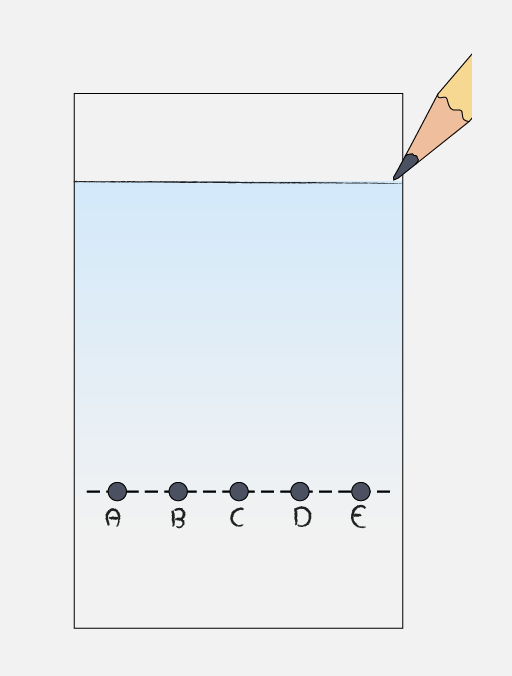
A glass filled with water, with a pencil poised above it. Below the water line, there are five labeled points marked A, B, C, D, and E, connected by a dashed line.
Do

Use a pencil to draw a faint baseline 1 cm from the bottom and apply small, equally spaced spots using a capillary tube.

A diagram showing a container filled with light blue water. At the bottom, there are five dark circles labeled A, B, C, D, and E, with a dashed line above them. A pen is positioned at the top right, poised to touch the water.
Don't

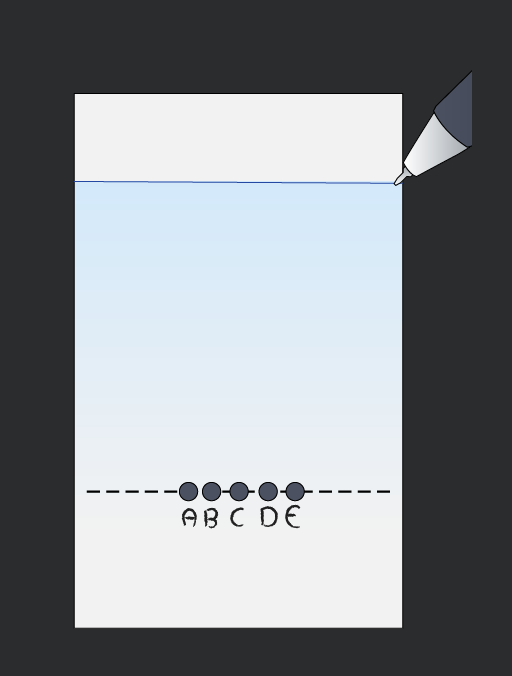
Use a pen to draw the baseline – the ink may be soluble in the solvent, affecting the results.
Place spots close together – these can run up the plate together and be hard to distinguish.

Add to favourites

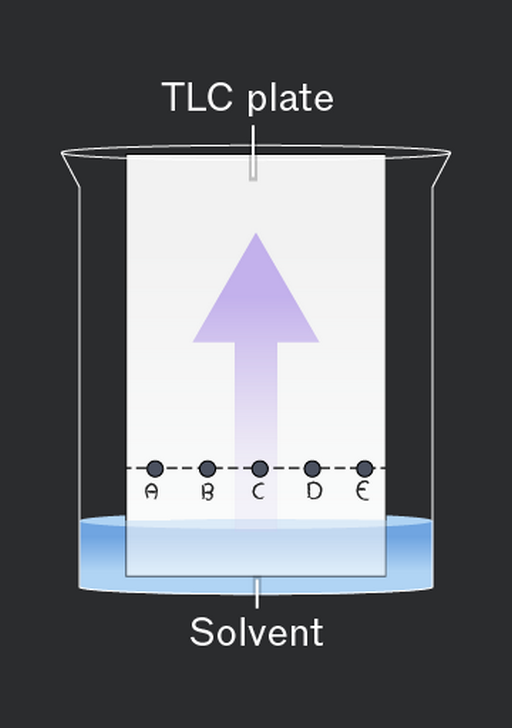
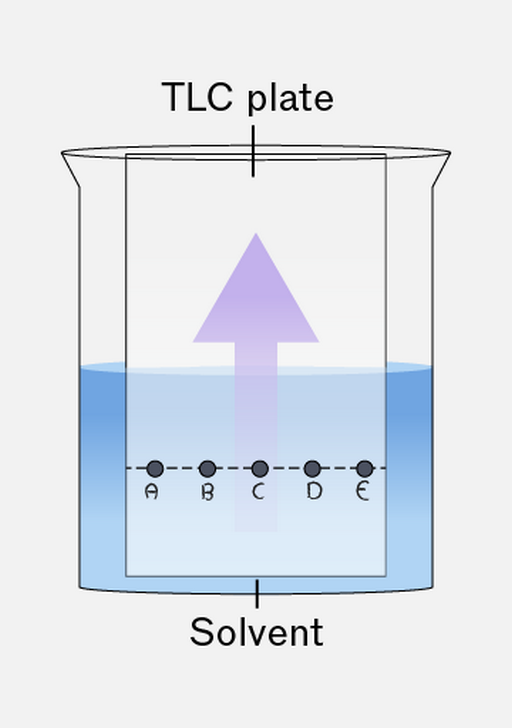
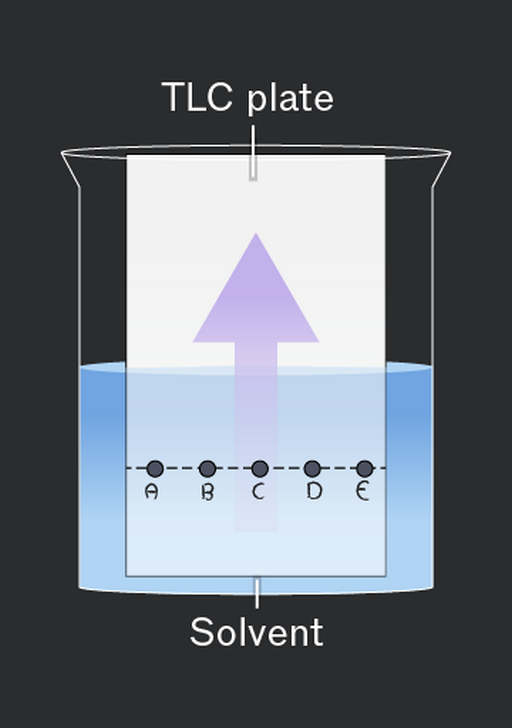
The level of the solvent in the developing chamber is important in thin layer chromatography.
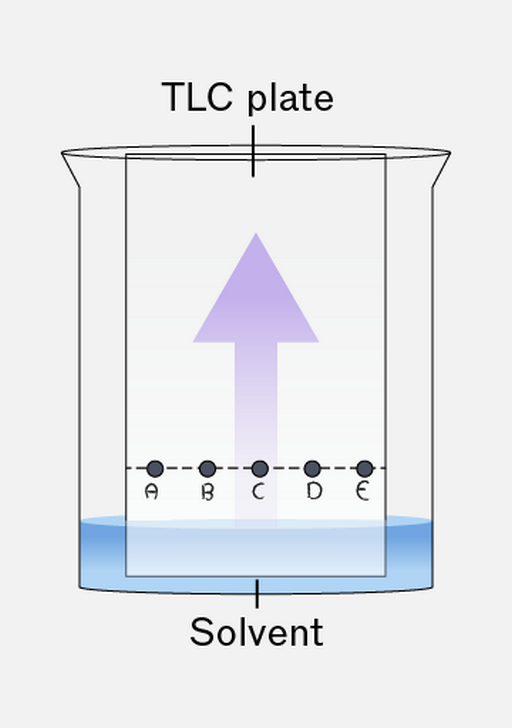
A diagram showing a TLC plate positioned above a solvent in a beaker. The TLC plate is labeled at the top, and the solvent is labeled at the bottom. There are five points marked A, B, C, D, and E along the bottom of the TLC plate, with an upward arrow indicating the movement of the solvent.
Do

Ensure the solvent level is below the pencil line when placing the plate in the chamber.

A diagram showing a TLC plate submerged in a solvent within a beaker. The TLC plate is positioned vertically with an upward arrow indicating movement. Below the plate, there are labels A, B, C, D, and E marked along a dashed line.
Don't

Let the solvent cover the spots – they will dissolve into the solvent and move from their original start-point.

Add to favourites

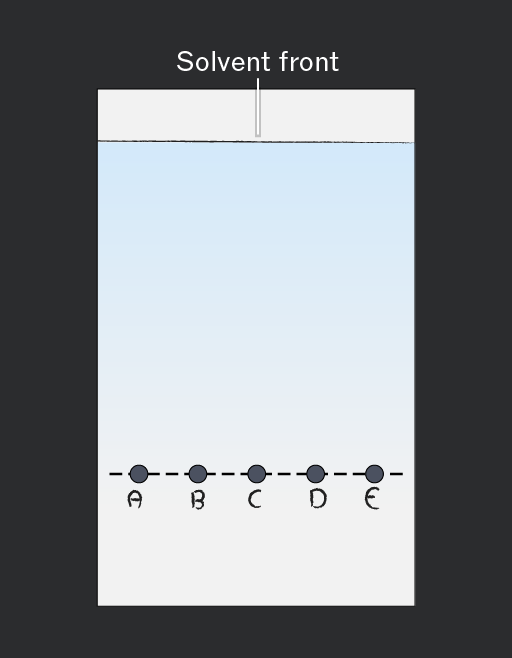
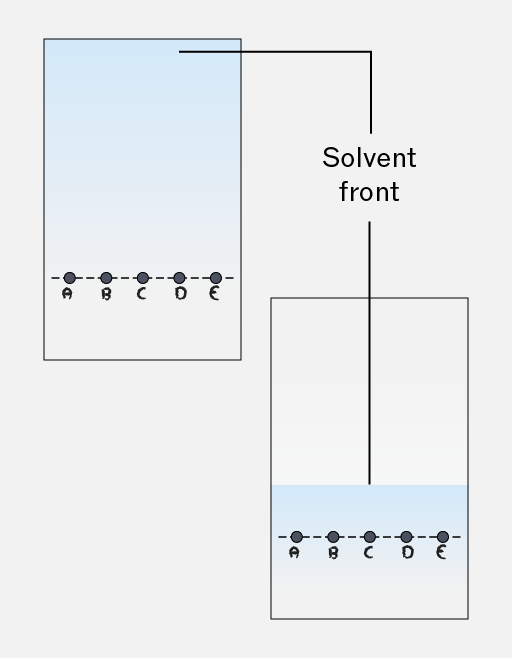
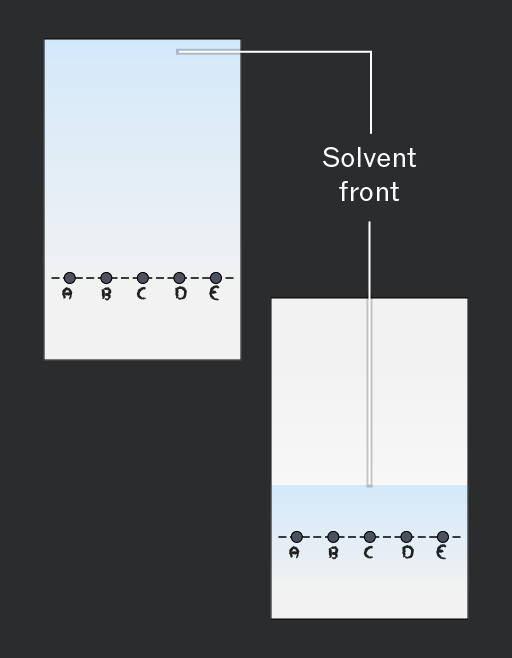
The timing of plate removal in thin layer chromatography is critical for robust analysis.
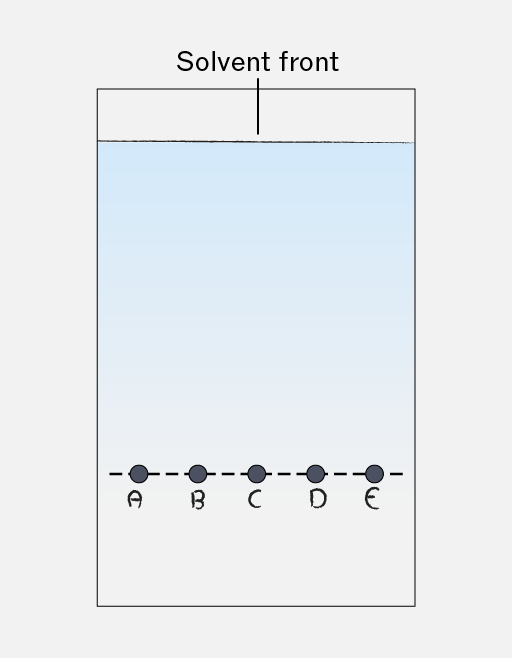
An illustration showing a solvent front at the top. Below it, there are five labeled points marked A, B, C, D, and E, arranged in a horizontal line.
Do

Remove the plate when the solvent front is ~1 cm from the top and dry it in a fume cupboard before viewing under UV.

Two diagrams showing a solvent front. The first diagram shows a light blue background with a dashed line and labels A, B, C, D, and E at the bottom. The second diagram also has a light blue background with a solvent front indicated, and the same labels A, B, C, D, and E at the bottom.
Don't

Leave the plate too long – if the solvent front goes to the top of the plate the distance moved by the solvent cannot be quantified.
Remove the plate too soon – if the solvent front has not moved far the separation will be less and the Rf calculations will lack resolution.

Add to favourites

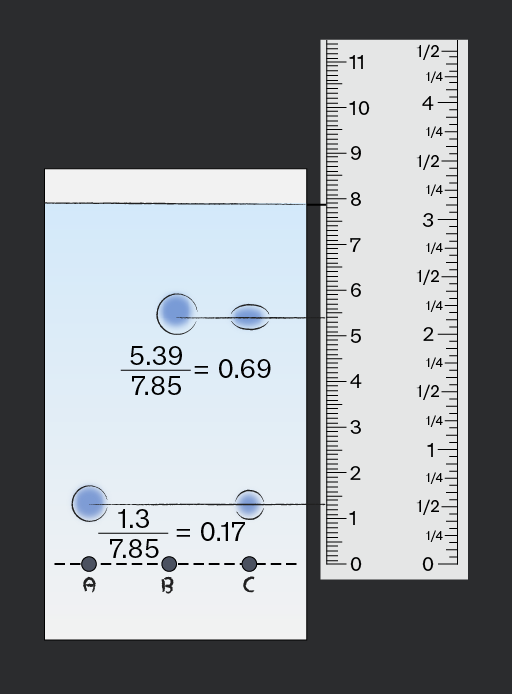
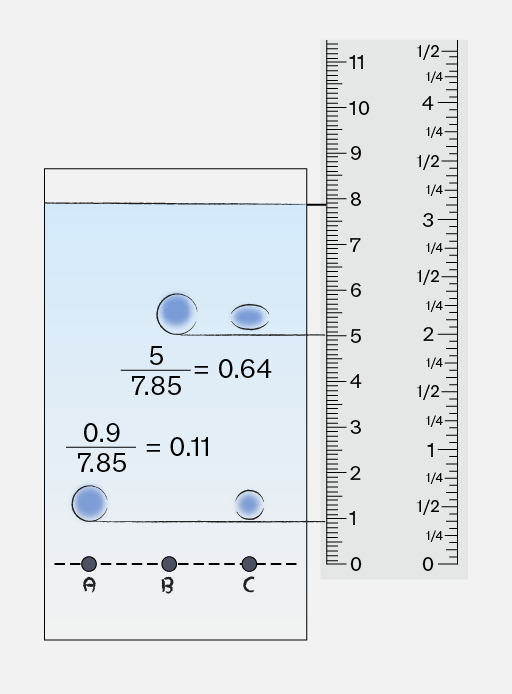
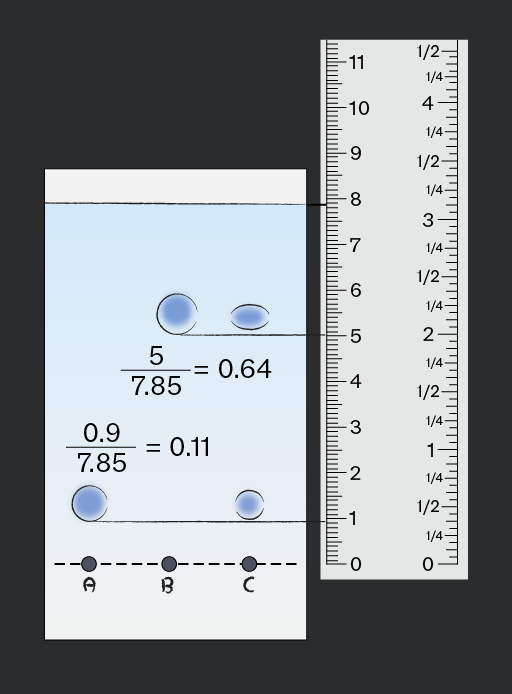
Identify the center of each component spot when analysing thin layer chromatography.
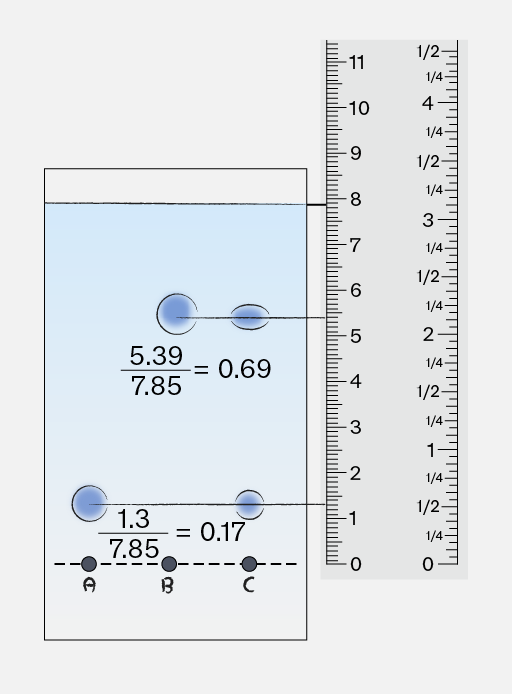
A diagram showing a container with water and three bubbles labeled A, B, and C. The text '5.39 / 7.85 = 0.69' is positioned above two bubbles, and '1.3 / 7.85 = 0.17' is below the bubbles. A ruler is displayed on the right side, marked with measurements from 0 to 11.
Do

Use a ruler to measure from the baseline to the centre of each spot and to the solvent front.

An illustration showing a container with three blue circles labeled A, B, and C at the bottom. Above the circles, there are two fractions: 5/7.85 = 0.64 and 0.9/7.85 = 0.11. To the right, there is a ruler marked with measurements from 0 to 11, with fractional divisions of 1/4 and 1/2.
Don't

Measure to the base of the spots – the Rf is based on the mean movement of the sample.

Add to favourites

Calculate the starting mass of methyl benzoate using:

Then calculate the theoretical yield of benzoic acid from the balanced equation, using:

Then calculate the percentage yield using:

Compare the measured melting range with a literature value

Using the chromatogram calculate the values to compare methyl benzoate, benzoic acid and the recrystallised product, using:

Add to favourites